Home Blog

How I Actually Lost Belly Fat Without Gimmicks

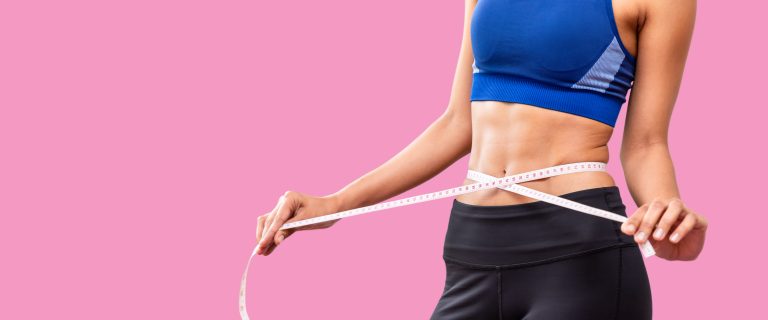
Pexels Photo 7991940

How I Actually Lost Belly Fat — No Gimmicks, No Magic Pills

I’m going to be straight with you. I spent almost two years doing crunches every morning, cutting carbs on weekdays, and drinking green tea like it was my religion. And my belly? It barely moved.

It wasn’t until I sat down, got frustrated, and actually studied what was going wrong that things started to change. Not overnight. Not dramatically. But steadily, and for real this time.

This article is everything I wish someone had told me before I wasted those two years.

First, Understand What You’re actually fighting.

Belly fat is not just one thing. There are two types of fat sitting in your midsection, and they behave completely differently:

Subcutaneous fat is the soft stuff you can pinch. It sits just under the skin. Annoying, but not dangerous.

Visceral fat is the one that wraps around your organs—your liver, intestines, and pancreas. You can’t see it or grab it. But this is the one that raises your risk for heart disease, type 2 diabetes, and metabolic issues.

Here’s why this matters: Most people are trying to “spot reduce”—doing hundreds of sit-ups, hoping their bellies disappear. That’s not how the body works. You can’t tell your body where to burn fat from. Fat loss happens systemically—your body decides where to pull from, and it usually comes off from wherever it went on last.

The good news? Visceral fat — the dangerous kind — actually responds faster to lifestyle changes than subcutaneous fat. So even when the mirror isn’t showing much change, your health is improving underneath.

The Real Reason Most People Fail

Before I get into what to do, I want to address the mistakes I made—because I see other people making the same ones.

Mistake #1: Eating “healthy” but eating too much

This one hurt. I switched to almonds, avocado, brown rice, and olive oil. All genuinely healthy foods. But I was eating them in portions that kept me in a calorie surplus. Healthy food can still make you fat if you eat too much of it. A handful of almonds sounds innocent until you realize it’s 200 calories and you’re grabbing “handfuls” three times a day.

Mistake #2: Cardio without strength training

I was running 4–5 days a week. I lost some weight initially, then plateaued hard. What I was missing was muscle. Muscle tissue burns more calories at rest. When you only do cardio and restrict food, your body adapts — your metabolism slows down, and fat loss stalls. Adding resistance training changed the game for me completely.

Mistake #3: Sleeping badly and wondering why I was always hungry

Nobody talks about this enough. When you’re sleep-deprived, your hunger hormone (ghrelin) spikes, and your fullness hormone (leptin) drops. I was getting 5–6 hours of sleep and feeling ravenous the next morning. No amount of willpower fixes a hormonal issue caused by poor sleep.

Mistake #4: Thinking stress doesn’t count

Cortisol — the stress hormone — directly promotes fat storage around the belly. I had a stressful job, ate late, and wondered why my midsection wasn’t cooperating. Chronic stress and belly fat are deeply connected.

What Actually Works — Step by Step

Step 1: Fix Your Food, But Don’t Make It Complicated

You do not need a complicated meal plan. What you need is a sustainable calorie deficit—meaning you consume slightly fewer calories than your body burns. That’s it. That’s the core of fat loss.

A deficit of 300–500 calories per day is the sweet spot. Too aggressive (like 1,000+ calorie deficit) and your body panics—muscle breaks down, metabolism crashes, and you feel terrible.

Practical way to figure out your numbers:

Use an app like MyFitnessPal or Cronometer for 2 weeks. Don’t change anything yet — just track what you normally eat. This was eye-opening for me. I thought I was eating around 1,800 calories. I was eating closer to 2,600.

Once you know your actual intake, subtract 300–400 calories and stay there.

What to eat more of:

  • Protein — This is the most important macro for fat loss. It keeps you full, preserves muscle, and has a high “thermic effect” (meaning your body burns more calories just digesting it). Aim for 0.7–1 gram per pound of bodyweight. Eggs, chicken, Greek yogurt, lentils, cottage cheese, fish. Pick what you like and eat it consistently.
  • Fiber-rich vegetables — Broccoli, spinach, cabbage, zucchini. These fill your stomach with very few calories. A massive bowl of salad might be 150 calories. That’s hard to overeat.
  • Whole foods over processed ones—not because processed food is evil, but because it’s engineered to make you eat more. Ultra-processed food (chips, biscuits, instant noodles) bypasses your satiety signals. You can eat 800 calories of it and still feel hungry.

What to eat less of (not necessarily eliminate):

  • Liquid calories — sugary drinks, juices, sodas, fancy coffees. These add hundreds of calories without making you feel full.
  • Refined carbs in large amounts—white bread, pastries, and white rice in big portions. These spike blood sugar and hunger.

No food needs to be completely forbidden. If you love biryani on weekends, eat it. Just be aware of the rest of the week.

Step 2: Build Some Muscle — Even If You Don’t Want to “Get Big”

I know some people — especially women — avoid weights because they don’t want to look bulky. That fear is mostly unfounded. Building significant muscle mass takes years of dedicated effort and usually requires eating in a surplus. What you’ll actually get from 3 days/week of resistance training is a leaner, more toned body and a metabolism that burns more at rest.

You don’t need a gym membership to start. A pair of dumbbells or resistance bands at home is enough. But if you have access to a gym, use it.

A basic weekly plan that works:

  • Day 1: Upper body (push) — Push-ups, shoulder press, chest press
  • Day 2: Lower body — Squats, lunges, hip thrusts
  • Day 3: Upper body (pull) — Rows, pull-downs, bicep curls
  • Rest days: light walking, stretching

Compound movements — squats, deadlifts, rows — work multiple muscle groups simultaneously and burn more calories than isolation exercises like bicep curls or crunches.

Yes, you can still do ab exercises. Planks, leg raises, and bicycle crunches are great for core strength. But they won’t reveal your abs — that comes from reducing fat.

Step 3: Move More Throughout the Day (This Is Underrated)

Structured exercise might account for 30–60 minutes of your day. The other 23+ hours matter too. This is called NEAT — Non-Exercise Activity Thermogenesis. It includes walking, household chores, fidgeting, and taking the stairs.

People who are naturally lean tend to move more throughout the day without even thinking about it.

The simplest thing I did: I started walking 8,000–10,000 steps a day. I tracked it with my phone (Samsung Health works fine, or a basic Fitbit). Walking after meals specifically — even a 10–15 minute walk — helps blunt blood sugar spikes and improve digestion.

If you have a desk job, set a reminder to stand up every hour. It sounds trivial. Over weeks and months, it adds up to thousands of extra calories burned.

Step 4: Sleep Like It’s Your Job

If you’re only going to change one thing after reading this, make it sleep.

Seven to nine hours of quality sleep per night regulates the hunger hormones I mentioned earlier. It also lowers cortisol, helps your muscles recover from exercise, and gives you the mental energy to make better food choices.

A few things that helped me:

  • Same wake time every day — even weekends. This anchors your circadian rhythm.
  • No screens for 30 minutes before bed — I use a blue light filter app (like f.lux on the laptop) if I have to work late.
  • Keep the room cool and dark—sleep quality improves significantly.
  • Avoid big meals or heavy food 2–3 hours before bed—not because of some metabolism myth, but because you’ll sleep better.

Step 5: Manage Stress — Seriously

Cortisol is the enemy of a flat belly. Under chronic stress, your body stores energy preferentially around the abdomen. It’s an evolutionary mechanism — your body thinks you’re in danger and holds onto reserves.

You can’t eliminate stress. But you can build a buffer against it.

What worked for me:

  • 10-minute morning walks — No podcast, no phone. Just walking and looking around. Sounds simple. Dramatically reduced my baseline stress levels.
  • Journaling at night — Even just 5 minutes of writing down what’s bothering me cleared my head before sleep.
  • Apps like Headspace or Insight Timer for short guided breathing sessions — 5 minutes of box breathing (inhale 4 counts, hold 4, exhale 4, hold 4) actually calms the nervous system down.

You don’t need to become a meditation monk. Just introduce small stress-reduction habits and be consistent.

Step 6: Alcohol — The Hidden Saboteur

One area people rarely want to confront. Alcohol does two things that directly harm belly fat loss:

  1. It’s calorie-dense with no nutritional value. A few beers on a Friday night can easily be 600–800 calories.
  2. When you drink, your body prioritizes metabolizing the alcohol over everything else — meaning fat burning essentially pauses.

This doesn’t mean never drink. But if you’re serious about losing belly fat and you’re drinking regularly, that’s worth looking at honestly.

What About Supplements?

Let me save you money here.

There is no supplement that burns belly fat. Not fat burners, not green tea extract, not CLA, not raspberry ketones. The research on most of these is either poor quality, shows tiny effects, or only works when combined with a proper diet and exercise — in which case, the supplement isn’t doing much.

The few things with legitimate (though modest) evidence:

  • Creatine — For muscle building and performance, not fat loss directly.
  • Caffeine — Mildly increases metabolic rate and performance. A coffee before a workout is perfectly fine.
  • Protein powder — Not a fat burner, but a convenient way to hit your protein targets. Whey, casein, or plant-based — whatever you digest well.

That’s really it. The rest is marketing.

How Long Will It Actually Take?

Honestly? Longer than you want. And that’s okay, because the approach that takes longer tends to actually stick.

A realistic rate of fat loss is 0.5–1% of your bodyweight per week. For most people, that’s about 0.5–1 kg per week. Some weeks you’ll lose more, some weeks you’ll lose nothing (especially around your menstrual cycle if you’re a woman — water retention is real and temporary).

Belly fat is often one of the last places to visibly change, especially in men. The body tends to lose fat from the face, chest, and limbs first. It can feel discouraging. This is why people quit — not because the plan isn’t working, but because the results are delayed.

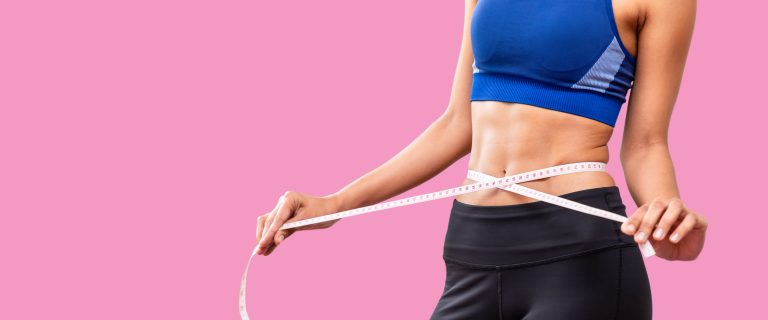
Take measurements (use a tape measure around your waist) and progress photos every 2 weeks. The scale lies because of water weight and muscle fluctuations. Measurements and photos show the real picture.

The Weekly Routine That Changed Things for Me

Here’s what a basic week looked like when I finally started seeing results:

DayActivity
MondayStrength training (45 min) + 8,000 steps
Tuesday20-min walk + rest
WednesdayStrength training (45 min) + 8,000 steps
ThursdayLight yoga or stretching + walk
FridayStrength training (45 min)
SaturdayLong walk (1 hour) or outdoor activity
SundayFull rest

Eating: High protein, mostly whole foods, tracking calories loosely (not obsessively), eating slowly and stopping when full.

Sleep: 7.5 hours as a non-negotiable goal.

Stress: 10-minute morning walk daily, journaling 3x per week.

Results after 3 months: 7 kg down, waist reduced by 6 cm, noticeably more energy, clothes fitting differently.

A Few Things Worth Knowing

Hormonal issues are real. If you’re doing everything right and seeing zero results, it’s worth getting bloodwork done — thyroid function, insulin resistance, and testosterone/estrogen levels can all affect where and how your body stores fat. Don’t self-diagnose, but don’t dismiss it either.

Menopause changes things. Hormonal shifts during perimenopause and menopause often cause fat redistribution toward the abdomen. This doesn’t mean nothing can be done—it means you may need to be more deliberate about strength training and managing cortisol.

Age matters, but less than you think. Yes, metabolism slows slightly with age. But the bigger factors are reduced activity, muscle loss from sedentary living, and dietary habits — all of which are within your control.

The Honest Truth Nobody Wants to Hear

There is no secret. There’s no combination of foods that melts belly fat. No ab workout burns it away. There’s no supplement worth taking.

What works is genuinely boring: eat slightly less than you burn, eat mostly whole foods with plenty of protein, move your body consistently, sleep well, stress less.

The “secret” is just doing those basic things consistently for months—not days, months—without quitting when results are slow.

The reason people keep searching for shortcuts is that the real answer feels too simple to be true. But it is true. It’s just not easy. And there’s a difference between simple and easy.
20-Minute Workouts: The Honest Truth That Works

Baner Size Woman Exercise In The Gym And Poses In 2026 01 07 00 33 41 Utc 1024x452

The Honest Truth About 20-Minute Workouts (And Why They Actually Work)

I used to laugh at people who said, “I don’t have time to work out.” Not in a mean way — I just genuinely didn’t understand it. Then I started a full-time job, picked up a freelance project on the side, and somehow became the person who cooks dinner every night because nobody else will. Suddenly, I got it.

The gym sessions I used to love — 60, sometimes 90 minutes — disappeared. I tried waking up at 5 AM like those productivity YouTubers told me to. Lasted four days. Then I tried skipping workouts “just this week.” Three weeks passed.

What actually saved me wasn’t some revolutionary fitness philosophy. It was accepted that 20 minutes, done consistently, is worth infinitely more than a perfect 90-minute session done twice a month.

This article is everything I’ve figured out, through trial and a lot of error, about building a daily 20-minute workout that doesn’t feel like punishment — and that actually produces results you can see.

Why 20 Minutes Is Not “Cheating”

There’s a weird guilt that comes with short workouts. Like you’re cutting corners. Like, real fitness people don’t do this.

Here’s the thing: your muscles don’t know how long you’ve been in the gym. They respond to tension, effort, and recovery. A focused 20-minute session where you’re actually pushing yourself will beat a lazy 60-minute gym visit where you spend 15 minutes finding parking and 20 minutes scrolling your phone between sets.

Research backs this up consistently. High-intensity interval training (HIIT) has been studied extensively, and even 10–15 minute bursts of elevated heart rate produce measurable cardiovascular and metabolic improvements. The American College of Sports Medicine has published guidelines recognizing that intensity can compensate for duration when it comes to health outcomes.

But beyond the science, there’s a practical truth: the workout you do beats the perfect workout you plan but skip.

The Structure That Actually Works

Before jumping into exercises, let me walk you through the framework I use. This isn’t a rigid template — it’s more like a skeleton you can dress differently depending on your day.

Minutes 0–2: The Activation Warm-Up

Skipping the warm-up is the fastest way to either hurt yourself or perform poorly. But you don’t need 10 minutes of stretching. Two minutes of dynamic movement is enough to wake your body up.

I do this every single time, no exceptions:

  • 30 seconds of arm circles (both directions)
  • 30 seconds of hip circles
  • 30 seconds of high knees (slow, deliberate)
  • 30 seconds of leg swings

That’s it. Two minutes, and your joints are ready, your heart rate is slightly elevated, and your brain has switched modes from “sitting at desk” to “body is moving now.”

Minutes 2–17: The Main Circuit

This is the 15-minute core of everything. I use a circuit format — meaning you move from one exercise to the next with minimal rest, then rest briefly between rounds.

Minutes 17–20: Cool Down and Breathwork

Not optional. This is where you prevent next-day soreness from ruining tomorrow’s session. Three minutes of slow stretching and two to three deep breaths before you jump in the shower. Done.

The 20-Minute Workout (Three Versions)

I’ve designed three versions based on what’s available to you — no equipment, dumbbells, or resistance bands. Pick the one that fits your reality right now.

Version 1: Zero Equipment, Anywhere

This is the one I use when I’m traveling or when I just cannot face the thought of setting anything up.

Circuit A (do 3 rounds, 40 seconds on / 10 seconds rest)

  1. Jump Squats — Land softly, hinge your hips back. Don’t let your knees cave inward. If jumping hurts your knees, do regular squats and move faster.
  2. Push-Ups — Hands slightly wider than shoulder-width, body in a straight line. Go slow on the way down (3 seconds), explosive on the way up. If full push-ups aren’t happening yet, do them from your knees. No shame. I did knee push-ups for two months when I came back from a shoulder injury.
  3. Mountain Climbers — Bring your knee toward your chest, alternating fast. Keep your hips level — don’t let them shoot up.
  4. Glute Bridges — Lie on your back, feet flat, push your hips up, and squeeze hard at the top. Hold for a beat before lowering. This one looks easy but if you’re doing it right, your glutes will be begging after round two.
  5. Plank Hold — Forearms or hands, doesn’t matter. Focus on breathing. Don’t let your lower back sag or your hips rise up.

Rest 60 seconds between rounds.

Three rounds at 40 seconds each, with 10-second transitions and 60-second rests, lands you comfortably in that 15-minute window.

Version 2: Dumbbell Circuit (Home or Gym)

If you have a pair of dumbbells — even adjustable ones — this version adds more muscle-building stimulus. I use 15 kg dumbbells for most things, but pick a weight where the last 4–5 reps feel genuinely hard.

Circuit B (3 rounds, 45 seconds on / 15 seconds rest)

  1. Dumbbell Goblet Squat — Hold one dumbbell at your chest, squat deep, elbows inside your knees at the bottom. Great for quads, glutes, and even your core.
  2. Dumbbell Row (each arm) — Brace on a chair or bench, pull the dumbbell to your hip. Your back should be doing the work, not your bicep. A mistake I made for years was jerking the weight up — slow down, feel the lat.
  3. Dumbbell Overhead Press — Stand or sit, press both dumbbells from shoulder height to overhead. Control the descent. Shoulders are easy to hurt if you’re sloppy here.
  4. Romanian Deadlift — Hinge at the hips, soft bend in the knees, dumbbells close to your legs. You should feel a stretch in your hamstrings. If you don’t feel it there, you’re squatting instead of hinging.
  5. Dumbbell Curl to Press — Curl up, then press overhead in one fluid movement. Compound exercise, maximum time efficiency.

Version 3: Resistance Band Circuit (Best for Travelers)

Bands are genuinely underrated. A set of three resistance bands costs less than a restaurant meal and fits in any bag. I’ve used the Fit Simplify set for two years — still going strong.

Circuit C (3 rounds, 40 seconds on / 20 seconds rest)

  1. Banded Squat — Band under feet, handles at shoulders. Same squat mechanics as always.
  2. Banded Pull-Apart — Hold the band in front of you at chest height, arms straight. Pull it apart until your hands are out to the sides. Incredible for posture and rear deltoids, especially if you sit at a desk all day.
  3. Banded Deadlift — Band under feet, hinge, and pull. If you’ve never done a deadlift before, start here — bands are forgiving and teach you the movement pattern safely.
  4. Banded Push — Anchor the band behind you, hold it at chest height, push forward against resistance. Mimics a chest press without a bench.
  5. Banded Lateral Walk — Band around your ankles, mini squat position, walk sideways. Your hips will hate you. That means it’s working.

Scheduling: When to Do It and How to Make It Stick

The honest answer? The “best” time to work out is whenever you’ll actually do it.

That said, here’s what I’ve noticed after trying different times:

Morning sessions — Much easier to be consistent. Nobody can steal your morning workout because an unexpected meeting popped up. Downside: you need 10–15 extra minutes because your body is cold and stiff. That warm-up matters more in the morning.

Lunch break sessions — Underrated. If you can access a space (even a quiet office, a stairwell, or your car), a lunchtime workout breaks the mental fog of a long morning. I did this for six months during a particularly grinding work period, and it was genuinely the best thing for my afternoon focus.

Evening sessions — Great for performance (your body temperature and strength are naturally higher), but life gets in the way more often. Dinner, fatigue, social plans. It’s easier to skip an evening session than a morning one.

My actual recommendation: Do it in the morning, at least on weekdays. Reserve evening sessions for weekends when the schedule is more flexible.

Apps I’ve Actually Used and What They’re Good For

I’m not a gear person. I don’t need fancy apps or $3,000 home gym setups. But a few tools have genuinely helped:

Nike Training Club — Free (mostly), and the workout library is genuinely excellent. The 15–20 minute HIIT and strength sessions are well-designed. Not all trainers are equally motivating, so poke around and find one whose style works for you.

Interval Timer (by Deltaworks) — Simple, no-frills interval timer app. I use this for all my circuit work. Set your work time, rest time, and number of rounds. It just works.

Strong App — If you’re logging dumbbell or band workouts and want to track progression over time, Strong is clean and easy. Seeing that you went from 10 kg to 15 kg on goblet squats over two months is genuinely motivating.

YouTube — Still underrated. Search “20-minute home workout no equipment,” and you’ll find thousands of videos. For structure and instruction, I like the channels by Heather Robertson and Sydney Cummings Houdini — both post full, free workouts and actually explain form.

Common Mistakes That Kill Progress

I’ve made most of these, so let me save you the time.

Going too hard on Day 1. You feel motivated, so you pick the hardest circuit, push through every set, and feel amazing. The next day you can’t sit down because your legs are destroyed. You skip two days. Momentum gone. Start at 70% effort in the first week.

Ignoring recovery. Twenty minutes a day is manageable. Twenty minutes a day with zero sleep, high stress, and bad nutrition will eventually run you into the ground. The workout is only one variable. If you’re consistently sore and tired, you need more sleep before you need more exercise.

Not progressing the resistance. Doing the same bodyweight workout every day for three months will stop producing results after about four to six weeks. Your body adapts. Add a harder variation, more reps, or external resistance when things start feeling too easy.

Treating missed days as failure. Miss a day and you’ve lost nothing. Miss a week and you’ve lost very little. The people who make fitness stick for years are not the ones who never miss — they’re the ones who don’t spiral when they do miss.

Counting light movement as a workout. A casual walk is great for health, but it’s not a replacement for a training session. Be honest with yourself about whether you’re actually pushing.

What Results to Realistically Expect

This is where I want to be straightforward with you, because most fitness content is not.

In the first two to four weeks, you probably won’t see much visual change. What you will notice: better energy, slightly improved mood, and — if you were completely sedentary before — some initial muscle soreness that passes after week two.

By weeks four to eight, if you’re eating reasonably well, you’ll notice your clothes fitting differently. Strength improves noticeably. Bodyweight exercises that felt hard become manageable.

After three months of genuine consistency (which means 5 out of 7 days, not 7 out of 7, because life exists), real changes in body composition become visible. Cardiovascular capacity improves significantly. You’ll walk up stairs without getting winded. Little things.

Will 20 minutes a day turn you into an athlete? No. But that’s probably not your goal. If your goal is to feel stronger, have more energy, manage stress better, and not gain weight from a sedentary lifestyle, twenty focused minutes a day will absolutely get you there.

A Sample Week to Make This Concrete

Sometimes the biggest barrier isn’t knowing what to do — it’s not being able to picture it in your own life. Here’s how a real week looks for me:

Monday — Circuit A (bodyweight). Morning, right after coffee. 20 minutes total.
Tuesday — Circuit B (dumbbells), with slightly heavier weights than last week.
Wednesday — Active rest. A 20-minute walk, nothing more. The body needs it.
Thursday — Circuit A or C, depending on mood. Try to focus on explosiveness.
Friday — Circuit B. Log it in the Strong app. Did the numbers go up from Tuesday?
Saturday — Longer, optional session if time allows. Sometimes I’ll do 30–35 minutes. Sometimes I don’t and just enjoy the day.
Sunday — Rest. Actual rest. Stretch if you want, walk if you want. No guilt.

The Mental Side Nobody Talks About

The hardest part of building this habit isn’t the physical effort. It’s the internal negotiation that happens every morning when the alarm goes off, and your bed is warm, and your body says not today.

What actually helped me: I stopped waiting to feel motivated. Motivation follows action, not the other way around. I put my workout clothes next to the bed the night before. I don’t think about the workout, I just put them on. By the time I’m dressed, the decision has already been made by past-me.

Another thing: I stopped keeping a streak. Streaks feel great until you miss a day, and then the streak is “ruined,” and suddenly you’re back to zero. Instead, I just look at the month. Did I work out more days than I didn’t? Then it’s a good month.

Twenty minutes. Every day, or close to it. That’s genuinely all this requires. Not a gym membership. Not expensive equipment. Not a perfect diet running in parallel.

If you start this week, even imperfectly, you’re already ahead of where you were. The first session is always the hardest — not physically, but because you’re fighting inertia. After that, it just becomes what you do in the morning before the rest of your life starts.

That’s a good feeling. Worth chasing.

How to Build a Strength Training Routine from Absolute Zero

Muscular Man Lifting Weights In Dark Studio 2026 03 26 07 00 11 Utc 1024x683

How to Build a Simple Strength Training Routine When You Have No Idea Where to Start

How to Build a Strength Training Routine from Absolute Zero

Learn how to start lifting with confidence using simple steps, beginner-friendly exercises, and practical tips to build consistency and avoid common mistakes.

Let me be honest with you — the first time I walked into a gym, I spent 20 minutes pretending to stretch near the water fountain because I had absolutely no clue what to do. Everyone else seemed to know exactly which machine to grab, how many reps to do, and where to go next. I felt like I’d walked into a movie halfway through.

That was years ago. And what I eventually learned is that strength training, especially for beginners, doesn’t have to be complicated. In fact, the more complicated you make it early on, the faster you quit. I’ve seen it happen dozens of times.

This guide is what I wish someone had handed me on Day 1 — no fluff, no bro-science, no “you must do THIS, or you’ll never grow.” Just a practical, honest breakdown of how to actually get started with strength training when you’re a complete beginner.

Why Strength Training, Though?

Before we get into the “how,” let’s spend a minute on the “why” — not to motivate you with hollow promises, but because understanding what’s actually happening in your body changes how you approach training.

When you lift weights, your muscle fibers experience tiny micro-tears. Your body then repairs those tears and makes the muscle slightly stronger to handle that stress better next time. Over weeks and months, this process — called progressive overload — is what makes you visibly stronger and more capable.

Beyond aesthetics, strength training improves bone density, boosts metabolism, reduces joint pain, and genuinely improves mental health. A study published in JAMA Psychiatry found that resistance training significantly reduced depressive symptoms. And from personal experience? Nothing clears a bad week like a solid lifting session.

The Mistake Almost Every Beginner Makes

Here’s the trap: you watch a few YouTube videos, get excited, and put together a routine with 6 days of lifting, isolated exercises for every body part, and a supplement stack you found on Reddit.

Two weeks later, you’re burned out, confused, and back on the couch.

The problem isn’t motivation. The problem is that beginners try to train like intermediate or advanced lifters. Your body doesn’t need that. Not yet. In fact, beginners have a huge advantage called “newbie gains” — your body responds so aggressively to new stimulus that even a dead-simple 3-day-a-week program will give you noticeable results in 6–8 weeks. You don’t need complexity. You need consistency.

What “Simple” Actually Looks Like

A beginner-friendly strength routine has these core features:

  • 3 days per week (Monday, Wednesday, Friday works great — rest days matter)
  • Full-body workouts each session (not chest day, leg day, etc.)
  • Compound movements as the foundation (more on this below)
  • Progressive overload built in (you add weight or reps over time, not randomly)
  • 30–50 minutes per session maximum

That’s it. Anything more than this in the first 3 months is just noise.

The Core Movements You Actually Need to Learn

This is where most beginner articles fail you — they list 20 exercises without explaining which ones actually matter. Here’s the truth: strength training is built on a handful of foundational movement patterns. Everything else is just variation.

1. The Squat — “The King of Lower Body Movements.”

The squat trains your quads, hamstrings, glutes, and core all at once. Start with a goblet squat (hold a dumbbell at your chest) before moving to barbell back squats. This single exercise will teach you more about body mechanics than most machines ever will.

Common beginner mistake: Letting your knees cave inward. Fix this by actively pushing your knees outward as you stand up.

Target: 3 sets of 8–10 reps

2. The Hip Hinge — Deadlifts and Romanian Deadlifts

The hip hinge is a movement your body uses constantly — picking things up off the floor, loading groceries, even sitting down. The Romanian Deadlift (RDL) is the best starting point. Start with dumbbells, push your hips back (not squat down), keep your back flat, and feel the stretch in your hamstrings.

Once you’re comfortable, you can progress to conventional barbell deadlifts.

Common beginner mistake: Rounding the lower back. If your back rounds, the weight is too heavy. Drop it and practice the movement first.

Target: 3 sets of 8 reps

3. The Push — Dumbbell Bench Press or Push-Ups

Push movements target your chest, shoulders, and triceps. If you’re not ready for a bench press yet, push-ups are genuinely one of the best exercises in existence. Don’t underestimate them.

Once push-ups feel easy (3 sets of 15 reps), move to dumbbell bench press. When that gets easy, move to a barbell.

Common beginner mistake: Flaring elbows out at 90 degrees. Keep them at about 45–60 degrees from your torso to protect your shoulders.

Target: 3 sets of 8–12 reps

4. The Pull — Dumbbell Row or Let Pulldown

Most beginners have stronger push muscles than pull muscles, which leads to muscle imbalances and shoulder problems down the road. Pull exercises — rows and pulldowns — fix this.

Start with dumbbell single-arm rows. Rest one knee on a bench, brace your core, and pull the dumbbell toward your hip. If you have access to a cable machine, the let pulldown is also excellent for beginners.

Target: 3 sets of 10 reps

5. Core — But Not Crunches

Forget crunches. Your core’s real job is to resist movement — to keep your spine stable while your limbs move. The exercises that train this are:

  • Dead Bug: Lie on your back, arms up, legs bent. Slowly lower one arm and the opposite leg while keeping your lower back pressed to the floor.
  • Plank: Hold a straight line from head to heels. Start with 20-second holds and work up.
  • Pallof Press: Using a cable or resistance band, press the handle straight out and resist the rotational pull.

Target: 2–3 sets of whatever’s appropriate per exercise

Your Actual 3-Day-a-Week Beginner Program

Here’s a plug-and-play routine. Run this for 8–12 weeks before changing anything.

Day A (Monday & Friday)

ExerciseSetsReps
Goblet Squat310
Romanian Deadlift (dumbbells)38
Push-Up or Dumbbell Bench Press310
Dumbbell Single-Arm Row310 each side
Dead Bug38 each side

Day B (Wednesday)

ExerciseSetsReps
Dumbbell Deadlift38
Dumbbell Lunges310 each leg
Dumbbell Overhead Press310
Lat Pulldown or Resistance Band Row310
Plank320–30 sec

Rest 60–90 seconds between sets. Don’t rush. Rest is part of the program.

How to Actually Get Stronger Over Time (Progressive Overload, Explained Simply)

This is the piece most beginners either skip or don’t understand, and it’s the most important concept in all of strength training.

Progressive overload means making the workout slightly harder over time. Your body adapts to stress — so if you keep doing the same weight for the same reps every week, you stop growing stronger. You have to give it a reason to adapt.

Here’s how I recommend beginners do it:

The Double Progression Method:

Pick a rep range — let’s say 8–12 reps for goblet squats. Start at a weight where you can do 8 reps comfortably, but 12 feels impossible.

  • Week 1: 3 sets of 8 reps at 20kg
  • Week 2: Try for 9 reps on your first set
  • Week 3: Work up to 10–11 reps
  • Week 4: Hit 12 reps on all 3 sets → increase weight by 2–5kg

This is it. This simple approach, applied consistently, is responsible for most beginner transformations you see online. No tricks, no special programs. Just adding a little more each week.

Tools That Actually Help (Without Overcomplicating Things)

Tracking your workouts: Use a simple notebook or the free app Strong (available on iOS and Android). It logs your exercises, weights, and reps, and shows you your progress over time. I used a cheap pocket notebook for my first year — it still worked perfectly.

Watching form videos: Alan Thrall on YouTube has some of the clearest beginner lifting technique videos available. For squat form, Squat University (also on YouTube and Instagram) is excellent and very evidence-based.

Finding free programs: Reddit’s r/Fitness Wiki has vetted beginner programs like StrongLifts 5×5 and GZCLP that follow the principles above. These are free, tested by thousands of people, and well-explained.

Warm-up timer: Google’s built-in timer works fine. Set 90 seconds between sets when you’re starting out.

What to Do Before Each Session (The Warm-Up Nobody Does)

Jumping straight into heavy weights cold is a fast way to get injured and spend the next month resting instead of training. A proper warm-up takes 7–10 minutes and makes a huge difference in both safety and performance.

Here’s a simple sequence:

  1. 3–5 minutes of light cardio — a brisk walk on the treadmill or skipping rope. Just get the blood moving.
  2. Hip circles and leg swings — 10 reps each, both sides. Opens up the hips before squatting.
  3. Band pull-aparts — if you have a resistance band, 15–20 reps before any pressing. Warms up your rotator cuff.
  4. Warm-up sets — before your working weight, do 1–2 lighter sets first. If you’re squatting 40kg today, do a set at 20kg and one at 30kg first.

The Recovery Part Everyone Ignores

Strength doesn’t happen in the gym. It happens when you’re recovering from the gym. Two things matter more than any supplement or fancy program:

Sleep: Your body releases growth hormone primarily during deep sleep. If you’re sleeping 5–6 hours and wondering why you’re not getting stronger, that’s your answer. Aim for 7–9 hours. This is non-negotiable.

Protein: You need protein to repair and build muscle tissue. As a beginner, aim for roughly 1.6 grams of protein per kilogram of body weight per day. If you weigh 70kg, that’s about 112g of protein. You don’t need expensive protein supplements — eggs, chicken, dal, Greek yogurt, and lentils all work perfectly well.

Soreness: Being sore after your first few sessions is normal. Being so sore you can’t walk down stairs is a sign you overdid it. Aim for mild soreness, not crippling pain.

Real Talk: What Your First 8 Weeks Will Actually Look Like

Weeks 1–2: Everything feels awkward. The weights feel light and the movements feel unnatural. You’ll probably be sore after every session. This is normal. Your nervous system is learning to coordinate the movements — actual strength gains come shortly after.

Weeks 3–4: Movements start feeling more natural. You’ll notice you’re adding reps or a little weight. This is your body waking up.

Weeks 5–6: The “newbie gains” start becoming visible. Clothes fit differently. You feel stronger doing everyday tasks. People might start commenting.

Weeks 7–8: You’ve built a habit. Three workouts per week feels normal. You understand progressive overload. You can look at a barbell and not feel intimidated.

This is not a fantasy timeline. This is what happens when you show up consistently, even when you don’t feel like it.

Questions I Get Asked a Lot

“Should I do cardio too?” Yes, but keep it separate from strength sessions or do it after. Light cardio 2–3 times a week (30-minute walks or easy cycling) supports heart health and recovery without interfering with your lifting.

“How long should I rest between sets?” For compound lifts like squats and deadlifts, rest 90 seconds to 2 minutes. For smaller exercises like rows, 60 seconds is fine.

“What if I don’t have access to a gym?” You can get remarkably far with just a pair of adjustable dumbbells and a resistance band. Add a pull-up bar for around Rs. 1,500–2,000 and you have a fully functional home gym for beginners. The routine above works just as well at home.

“Do I need protein powder?” No. Real food sources work equally well if your total protein intake is adequate. Whey protein is just convenient, not magic.

“What if I miss a session?” Pick up exactly where you left off. Don’t try to cram two sessions into one to “make up” for a missed day. One missed session changes nothing.

One Last Thing

I’ve seen people completely transform their bodies and health with a program no more complicated than what’s in this article. Three days a week, compound movements, progressive overload, enough sleep and protein.

The reason most people don’t see results isn’t because they picked the wrong program. It’s because they kept switching programs, kept adding complexity before mastering the basics, or quit after two weeks when results weren’t instant.

Strength training rewards patience in a way few things do. The person who shows up for 12 boring, consistent weeks will always outperform the person who trained intensely for 3 weeks and burned out.

Start simple. Stay consistent. Add weight slowly. And honestly — trust the process more than your motivation. Motivation comes and goes. Showing up anyway is what actually builds strength.

How to Lose Belly Fat with Daily Exercise Fast

Fit Woman Measures Waist In Workout Clothes 2026 03 26 22 50 39 Utc 1 1 1024x426

How to Lose Belly Fat with Daily Exercise (What Actually Works)

I used to think belly fat was just about eating less. I’d skip dinner, feel miserable, lose maybe two pounds, then gain it back the moment life got stressful again. It took me embarrassingly long to realize that exercise — the right kind, done consistently — was the missing piece I kept brushing off as “secondary.”

This isn’t a piece about six-pack shortcuts or celebrity detox programs. It’s about what genuinely moved the needle for me and thousands of others who approached this with patience and a clear plan.

Why Belly Fat Is Stubborn (and Why That’s Not Your Fault)

Before anything else, you need to understand what you’re dealing with. Belly fat isn’t a single thing. There are two layers:

Subcutaneous fat sits just under the skin — the soft stuff you can pinch. Visceral fat lives deeper, wrapping around your organs. Visceral fat is the dangerous one, and it’s also the one most responsive to exercise. That’s actually great news.

The reason belly fat is hard to lose has a lot to do with cortisol, the stress hormone. When you’re stressed (poor sleep, bad diet, emotional tension), your body pumps out cortisol, which signals fat storage, especially around the midsection. This is why someone can eat clean and still carry a soft belly. Exercise, done intelligently, directly reduces cortisol over time. But — and this matters — overdoing exercise actually raises cortisol too. More on that later

The Core Principle: You Cannot Spot-Reduce

Let’s kill this myth early. Doing 200 crunches a day will not specifically burn belly fat. What it will do is build the abdominal muscles hidden underneath the fat — which is useful — but fat loss happens systemically. Your body decides where it pulls from.

What you can do is create the conditions where your body preferentially burns fat, including stubborn belly fat, through the right combination of exercise types.

What Kind of Exercise Actually Burns Belly Fat?

This is where most people go wrong. They either do too much cardio and plateau quickly, or they only do strength training and wonder why the belly isn’t moving.

The research — and my personal experience — points to a combination approach.

1. Strength Training (3–4 Days a Week)

This is the most underrated fat-loss tool, especially for belly fat.

When you build muscle through resistance training, your resting metabolic rate goes up. That means you burn more calories while sitting at your desk, sleeping, or watching TV. It’s a slow effect, but it compounds over months in a way cardio never does.

For belly fat specifically, compound lifts are key:

  • Squats engage your entire lower body and core
  • Deadlifts are arguably the best full-body exercise humans can do
  • Overhead press forces serious core stabilization
  • Pull-ups or rows build back strength while demanding abdominal bracing

You don’t need a fully equipped gym. A set of adjustable dumbbells (the Bowflex SelectTech 552s are popular for home use) or even resistance bands can get you far enough to start.

A basic beginner program like StrongLifts 5×5 or GZCLP — both free and available as apps — gives you structure without overcomplication.

2. High-Intensity Interval Training (2 Days a Week)

HIIT became trendy for a reason. Studies consistently show it’s more effective at reducing visceral fat than the same duration of steady-state cardio.

The basic format: work hard for 20–40 seconds, rest for equal or double that time, repeat 8–10 rounds.

A sample session (no equipment needed):

  • Jumping jacks × 30 seconds
  • Rest × 30 seconds
  • Burpees × 20 seconds
  • Rest × 40 seconds
  • High knees × 30 seconds
  • Rest × 30 seconds — Repeat for 15–20 minutes total

Apps like Nike Training Club (free) or FitBod have guided HIIT sessions if you prefer being told what to do rather than timing yourself.

Important: Don’t do HIIT every day. Two sessions per week is the sweet spot. More than that, and cortisol rises, recovery suffers, and you start to look and feel worse before you get better.

3. Low-Intensity Steady State (LISS) Cardio — More Valuable Than It Gets Credit For

Walking. That’s it. Walking is genuinely one of the most effective fat-loss tools available to humans, and it costs nothing.

A 45-minute walk at a brisk pace (roughly 5–6 km/h) burns meaningful calories, keeps cortisol low, improves insulin sensitivity, and — crucially — you can do it every single day without recovery issues.

When I committed to 45-minute morning walks six days a week, my belly measurement dropped noticeably within six weeks without changing anything else. It felt almost too simple to be real.

Aim for 7,000–10,000 steps daily. Apps like Google Fit or your iPhone’s built-in Health app track this automatically.

A Sample Weekly Plan (Realistic for Most People)

DayActivityDuration
MondayStrength Training (Full Body)45 min
TuesdayHIIT20 min + 30 min walk
WednesdayStrength Training45 min
ThursdayActive Recovery (light walk, stretching)30–45 min
FridayStrength Training45 min
SaturdayHIIT20 min + 45 min walk
SundayRest or easy walkAs desired

This plan has about 4–5 hours of total weekly activity — manageable for most working adults if you’re intentional about scheduling it.

The Mistakes I Made (So You Don’t Have To)

Mistake #1: Going Too Hard Too Fast

My first real attempt at consistent exercise looked like this: I signed up at a gym in January, went every day for two weeks, burned out completely by week three, and didn’t return for two months. Classic.

The sustainable pace for a beginner is three sessions per week. That’s it. Consistency over intensity is the rule for the first three months.

Mistake #2: Ignoring Recovery

Your body doesn’t change during the workout — it changes after, during sleep and rest. If you’re sleeping five hours, training hard, and wondering why you’re not losing fat, there’s your answer.

Seven to nine hours of sleep directly affects fat metabolism. Research at the University of Chicago showed that people on a caloric deficit who slept only 5.5 hours lost significantly more muscle and less fat compared to those sleeping 8.5 hours. Same diet, wildly different body composition results.

Mistake #3: Doing Only Cardio

Long, slow cardio is not efficient for belly fat loss if done in isolation. It burns calories in the session but does little to raise your metabolic rate long-term. Worse, the body adapts to sustained cardio by becoming more efficient — meaning you burn fewer calories doing the same run after a few months.

The combination of strength training + walking + occasional HIIT avoids this plateau entirely.

Mistake #4: Not Tracking Anything

I’m not suggesting obsessing over numbers. But if you have no data, you have no feedback. Tracking something — your daily step count, your workout days per week, your waist measurement every two weeks — gives you information to act on.

I use a simple note in Google Keep where I log my weekly workouts. Nothing fancy. The Strong app (free version) is excellent for logging strength sessions. A tape measure around your navel once every two weeks tells you more about belly fat progress than a scale ever will, since muscle gain can offset fat loss on the scale while your waist gets smaller.

What Exercise Alone Can’t Do

Here’s the honest part most fitness articles skip: exercise alone, without any dietary awareness, yields slower results than combining the two. You don’t need a perfect diet. But a few simple adjustments dramatically speed up what exercise achieves:

  • Protein at every meal. Protein keeps you full, supports muscle building, and has the highest thermic effect of any macronutrient (meaning you burn calories just digesting it). Eggs, chicken, lentils, Greek yogurt, paneer — whatever fits your food culture.
  • Reduce ultra-processed food. Not eliminate — reduce. Chips, packaged biscuits, and carbonated drinks. These create blood sugar spikes that trigger fat storage, especially visceral fat.
  • Don’t drink your calories. Chai with three spoons of sugar, fruit juices, energy drinks — these add 300–500 hidden calories that most people never count.

None of this requires calorie counting or a rigid meal plan. It’s awareness, not obsession.

How Long Does It Actually Take?

Real talk: with consistent effort — three to four workouts per week, daily walking, and reasonable eating — most people see:

  • Weeks 1–3: Better sleep, more energy, clothes fitting slightly differently (not visible yet)
  • Weeks 4–8: 1–3 cm reduction in waist circumference, noticeable in the mirror
  • Months 3–6: Significant visible change, especially if strength training is included
  • 6 months+: Meaningful transformation in body composition

The people who get frustrated and quit usually do so in weeks 3–5, right before results become visible. This is the “valley of frustration” — push through it.

Using Technology to Stay Consistent

A few tools worth knowing:

  • Cronometer (free app) — more accurate food tracking than MyFitnessPal, without the nagging upsell
  • Strong App — clean, simple workout logging
  • Nike Run Club — free running plans with audio coaching
  • Garmin or Fitbit — if you want a dedicated fitness tracker, both have solid free app ecosystems
  • YouTube channels — Sydney Cummings Houdyshell for free full workout videos, Jeff Nippard for science-based training explanations

None of these are required. Plenty of people have transformed their health with a notebook and no apps. But if tools keep you engaged, use them.

The Mental Side Nobody Talks About

Belly fat is often stored stress — literally. People who deal with chronic stress, poor sleep, or emotional eating will find that no exercise program works well until those things are addressed alongside it.

I’m not saying fix your entire life before starting. I’m saying: start the exercise, and notice how it changes your relationship with stress. Within two to three weeks of consistent movement, most people report sleeping better, handling difficult situations more calmly, and having fewer cravings. The exercise itself becomes the stress management.

This is the loop that makes long-term change stick: you exercise → you feel better → you sleep better → you have more energy → you want to exercise again.

A Word on Being Patient with Your Body

Belly fat is the last to go for most people. This is just biology. The body holds onto midsection fat longer than fat in the arms, face, or chest. This can feel incredibly discouraging when you’ve been consistent for two months, and your belly still looks the same.

What helps: track waist measurements instead of relying on visual assessment. Check photos. Ask people around you. Often, others notice your changes before you do, because you see yourself every day.

And remember — a body that moves daily, sleeps properly, and eats decently is already healthier than it was three months ago, regardless of how it looks in the mirror right now.

Wrapping Up — In the Most Human Way Possible

The formula isn’t complicated: lift weights a few times a week, walk every day, add in some HIIT twice a week, sleep, eat reasonably, and repeat for longer than you think necessary.

What makes it hard isn’t the knowledge. It’s the consistency when life gets in the way — when work is overwhelming, when it rains, when you’re tired, when motivation disappears (and it will). The people who actually lose belly fat and keep it off are not more motivated than you. They’ve just built habits that run on something more reliable than motivation.

Start with the walk. Today. That’s honestly where most journeys like this actually begin.

Daily Routine for Weight Loss Without a Gym

Diverse Fitness Activities In A Vibrant Studio Spa 2026 01 08 23 13 37 Utc 1024x819

Daily Routine for Weight Loss without Gym (A Real Plan, Not a Fantasy)

Let me guess — you’ve looked at gym memberships, done the mental math, factored in the commute, the crowds, the 6 AM alarm, and thought: there has to be another way.

There is.

I lost 14 kilograms over seven months without setting foot in a gym once. No fancy equipment, no personal trainer, no protein shakes lined up like trophies on my kitchen counter. What I had was a daily routine that I could actually stick to — and that’s the part nobody talks about enough. The best weight loss plan is the one you can realistically follow on a Tuesday when you’re tired, work was stressful, and your motivation is somewhere around zero.

This article is the plan. Built for real life, not Instagram.

Why the Gym Isn’t the Prerequisite You Think It Is

The gym is a tool. A useful one — but just a tool. Weight loss at its core is about energy balance: burning more calories than you consume over time. A gym helps you burn more calories efficiently, but it’s not the only way to get there.

In fact, for a lot of people, the gym actually hurts their consistency. The friction of going — changing, commuting, finding a machine, and getting home— adds enough resistance that skipping becomes the easier option. Remove the friction, and you remove one of the biggest enemies of consistency.

Home-based, outdoor, and lifestyle-integrated movement can absolutely produce real, lasting weight loss. The research backs this up, and so does the lived experience of millions of people who’ve done it.

The Foundation: Understand What Actually Drives Fat Loss

Before I give you a routine, I want to make sure we’re operating on accurate information — because a lot of what circulates online about weight loss is either oversimplified or flat-out wrong.

Caloric deficit is king. You lose weight when you consistently burn more energy than you take in. Exercise contributes to this, but so does your base metabolic rate (the calories you burn just existing), your daily movement (steps, standing, fidgeting), and what you eat.

Muscle matters more than cardio. Lean muscle tissue burns calories at rest. The more muscle you carry, the higher your resting metabolism. This is why resistance training — even with just your bodyweight — is essential to a weight loss routine, not optional.

Consistency beats intensity. A moderate routine done six days a week for three months beats an intense program done for two weeks then abandoned. Always.

With that foundation in place, here’s how to structure your day.

The Daily Routine: Hour by Hour (Flexible, Not Rigid)

This isn’t a military schedule. It’s a framework — adjust the timing to your actual life. What matters is that each element shows up in your day somewhere.

Morning: Set the Metabolic Tone (First 60 Minutes after Waking)

Step 1: Don’t reach for your phone first.

This sounds unrelated to weight loss. It’s not. Grabbing your phone immediately floods your brain with stimulation and stress signals before your nervous system has had a chance to settle. Elevated cortisol in the morning contributes to fat storage — particularly around the belly. Give yourself 10–15 minutes before the scroll begins.

Step 2: Drink 500ml of water before anything else.

Your body is dehydrated after 7–8 hours of sleep. Hydration kick-starts digestion, reduces the false hunger signals that many people mistake for appetite, and improves morning energy. This one habit alone has helped people reduce their total daily calorie intake by 100–200 calories simply by being less “hungry” right after waking.

Step 3: Morning movement — 15 to 20 minutes.

You don’t need a full workout here. What you need is to get your body moving before your brain has time to negotiate its way out of it.

Options that work well in the morning:

  • A brisk 15-minute walk outside (this is the best one — natural light exposure in the morning regulates your circadian rhythm, which directly affects sleep quality and hunger hormones)
  • A 15-minute bodyweight circuit (see routine below)
  • Sun salutations or light yoga flow — 10 to 20 minutes

Simple Morning Bodyweight Circuit (No Equipment):

Do this as a circuit — move from one exercise to the next with minimal rest. Complete 3 rounds.

  • Jumping jacks — 30 seconds
  • Bodyweight squats — 15 reps
  • Push-ups (or knee push-ups) — 10 reps
  • Alternating reverse lunges — 10 each leg
  • Plank hold — 30 seconds
  • High knees — 30 seconds

Rest 60 seconds between rounds. Total time: about 15 minutes. That’s it. Done before breakfast, done before excuses show up.

Breakfast: Fuel, Don’t Stuff

The goal of breakfast for weight loss is to eat enough protein and fiber to stay satiated until your next meal — not to restrict, not to skip.

Skipping breakfast might sound like a calorie-saving strategy, but for most people, it backfires. It leads to stronger cravings mid-morning, poorer food choices at lunch, and an overall increase in daily calories consumed. (Intermittent fasting works for some people — but only if it naturally reduces your total calorie intake, not because skipping breakfast is inherently fat-burning.)

Practical breakfast ideas that actually keep you full:

  • 2–3 eggs (any style) + a slice of whole wheat toast + half an avocado
  • Greek yogurt (full-fat, plain) + a handful of berries + a tablespoon of seeds
  • Oats with milk or water + banana + a spoon of peanut butter
  • Dahi (yogurt) + fruit + a boiled egg if you want something light but protein-forward

The pattern: protein + fiber + a small amount of healthy fat. That combination slows digestion, keeps blood sugar stable, and keeps hunger away for 3–4 hours.

Mid-Morning: The NEAT Opportunity Most People Miss

NEAT stands for Non-Exercise Activity Thermogenesis — basically, all the calories you burn through movement that isn’t formal exercise. Walking to a colleague’s desk instead of messaging them. Taking stairs. Standing while on a phone call. Fidgeting.

For people without a gym routine, NEAT is one of the most powerful fat-loss levers available — and most people never intentionally use it.

Practical NEAT habits to build into your day:

  • Set a timer for every 45–50 minutes of sitting. When it goes off, stand up, walk for 2–3 minutes, and then sit back down.
  • Take calls standing or walking whenever possible.
  • If you work from home, do household tasks on your break — vacuuming, tidying, and washing dishes. These burn real calories.
  • Park further away, take the longer route, and use stairs instinctively.

Research suggests that people with high NEAT burn 300–500 more calories per day than sedentary people doing the same exercise routine. Over weeks and months, this compounds into serious fat loss.

A fitness band or smartwatch like a Fitbit Inspire, Xiaomi Smart Band, or even your smartphone’s built-in step counter, can help you track this. Target 8,000–10,000 steps per day as a baseline goal.

Midday: The Main Workout (30–45 Minutes, 4–5 Days per Week)

For most people without a gym, the midday window — lunch break or early afternoon — is the most practical time for a structured workout session. You’re alert, cortisol is naturally higher (which gives you energy), and you haven’t yet accumulated the mental fatigue that kills evening motivation.

If midday doesn’t work for you, evening works fine. The best workout time is the one you’ll actually do.

The No-Gym Weekly Workout Plan

Here’s a four-day-per-week structure that combines resistance training and cardio without any equipment. You can do this in your living room, on your rooftop, in a park, or anywhere with a flat surface and enough space to lie down.

Day 1 — Lower Body Strength

  • Bodyweight squats: 4 sets of 15
  • Sumo squats: 3 sets of 12
  • Reverse lunges: 3 sets of 12 each leg
  • Glute bridges: 4 sets of 15
  • Wall sit: 3 sets of 45 seconds
  • Calf raises: 3 sets of 20

Rest: 60–75 seconds between sets.

Day 2 — Upper Body + Core

  • Push-ups: 4 sets of 10–15 (progress to wide-grip, close-grip, or decline as you get stronger)
  • Pike push-ups (targets shoulders): 3 sets of 10
  • Triceps dips on a chair: 3 sets of 12
  • Superman holds (back extension): 3 sets of 10
  • Plank: 3 sets of 40 seconds
  • Bicycle crunches: 3 sets of 20
  • Leg raises: 3 sets of 12

Day 3 — HIIT Cardio (20–25 Minutes)

Work 40 seconds, rest 20 seconds. Complete 5 rounds of:

  • Burpees
  • Jump squats
  • Mountain climbers
  • High knees
  • Lateral shuffles

No equipment. Maximum effort during the work intervals. This session will leave you genuinely breathless — that’s the point. The post-workout calorie burn from HIIT continues for hours afterward.

Day 4 — Full Body Circuit

  • Squat to overhead reach: 3 sets of 15
  • Push-up to side plank: 3 sets of 8 each side
  • Step-ups onto a chair or step: 3 sets of 12 each leg
  • Dead bug: 3 sets of 10 each side
  • Inchworm: 3 sets of 8
  • Jump rope (or simulate it): 3 sets of 60 seconds

Days 5–7: Active Rest

Not couch rest — active rest. This means:

  • A 30–45 minute walk at a comfortable pace
  • Light stretching or yoga
  • Swimming, cycling, dancing — anything enjoyable and low-intensity

Active rest keeps your body moving, aids recovery, and contributes to your daily calorie burn without adding training stress.

Lunch: The Meal That Makes or Breaks Your Day

Lunch is where most weight-loss efforts quietly fall apart. Busy, hungry, and with easy access to takeout or processed convenience food — this is the highest-risk meal.

The simplest strategy: build your lunch around protein and vegetables first, then add carbohydrates. When you fill half your plate with vegetables and a quarter with lean protein before thinking about rice or roti, portion control happens naturally.

Practical no-cook or minimal-cook lunch ideas:

  • Dal + sabzi + one roti (desi classic, genuinely balanced)
  • Grilled chicken or tuna with salad and whole grain bread
  • Leftover sabzi with eggs scrambled in
  • Chana salad with cucumber, onion, lemon — filling, high-protein, fast

Avoid: heavy fried foods at lunch. They cause a significant blood sugar spike and crash that leaves you craving something sweet by 3 PM, which is where most of the unplanned snacking happens.

Afternoon: Walk after Eating

A 10–15 minute walk after lunch is one of the most underrated weight-loss habits available. It’s not the walk itself that’s magical — it’s what it does to blood sugar. Post-meal walks significantly reduce the blood glucose spike from carbohydrates, which reduces insulin response, which reduces fat storage.

This is a habit backed by solid research, easy to implement, and costs nothing.

Evening: The Habit That Protects Everything You’ve Built

By evening, most people are mentally depleted. Decision fatigue is real — and it shows up as reaching for chips while watching TV, ordering something heavy because cooking feels impossible, or skipping the evening walk because the couch is too comfortable.

A few evening habits that protect your weight loss progress:

Eat dinner at least 2–3 hours before sleeping. Not because eating late directly causes fat gain (it doesn’t in a vacuum), but because late meals disrupt sleep quality, and poor sleep triggers hunger hormones the next day. It’s an indirect but significant cycle.

Prepare tomorrow’s breakfast tonight. When the decision is already made and the food is ready, you’re far less likely to skip it or replace it with something less useful.

Evening walk — 20 to 30 minutes. After dinner, this is powerful. The same blood sugar argument from the afternoon applies. Also: it gets you away from the kitchen, which removes the passive temptation to snack.

Night: Sleep Is Not Optional

This is the part most weight-loss content treats as a footnote. It should be the headline.

Sleep deprivation — even partial, chronic sleep deprivation at 5–6 hours instead of 7–8 — does the following:

  • Increases ghrelin (hunger hormone) by up to 24%
  • Decreases leptin (satiety hormone) by similar amounts
  • Raises cortisol, promoting fat storage particularly around the abdomen
  • Reduces insulin sensitivity, meaning your body handles carbohydrates less efficiently
  • Kills motivation for exercise the next day

You can have the perfect exercise routine and eat reasonably well, but if you’re consistently sleeping six hours, you’re fighting your own biology. Getting this to 7.5–8 hours is not a luxury — it’s a biological requirement for effective fat loss.

Practical sleep improvements:

  • No screens for 30–45 minutes before bed (or use Night Mode aggressively)
  • Keep your room cool and dark
  • Same sleep and wake time every day, including weekends — this one is hard but enormously impactful
  • Apps like Sleep Cycle can help you understand your sleep patterns and find your optimal wake window

What to Track (And What to Ignore)

Track this:

  • Daily steps (aim for 8,000–10,000)
  • Weekly waist measurement (same time, same spot, every Sunday morning)
  • How clothes fit — this is honest feedback
  • Sleep duration and quality
  • Weekly average of your morning weight (use Happy Scale or similar to smooth out daily fluctuations)

Ignore this:

  • Daily scale weight (too noisy to be useful)
  • Before/after photos from other people — your body will change differently
  • Calorie estimates from fitness trackers (they’re notoriously inaccurate, up to 30–40% off)

Common Mistakes People Make With At-Home Routines

Doing all cardio, no strength work. Cardio burns calories in the moment; strength training builds the infrastructure for long-term fat loss. You need both.

Being inconsistent for weeks, then going very hard to “make up” for it. This doesn’t work physiologically and almost always leads to injury or burnout.

Underestimating food. You can walk 10,000 steps and erase it with one oversized meal. Exercise and nutrition are partners, not substitutes for each other.

Expecting linear progress. Weight loss plateaus are normal and expected. The scale will stall for 1–2 weeks and then drop. This is the body adjusting, not the process failing. Most people quit during a plateau and never see the results that were days away.

Making the routine too complicated. The simpler your plan, the more likely you are to do it on hard days. Hard days happen every week.

Tools Worth Using (Free or Cheap)

  • MyFitnessPal or Chronometer — calorie and protein tracking. Even doing this for 2–3 weeks builds lasting awareness of what you’re eating.
  • Nike Training Club — free app with excellent no-equipment workout programs
  • YouTube: Chloe Ting, Heather Robertson, Mad Fit — all offer free, structured no-gym programs. Chloe Ting’s programs are particularly well-organized for beginners.
  • Fitbit or Xiaomi Smart Band — affordable step and sleep tracking
  • Happy Scale (iOS) or Libra (Android) — smooths out daily weight fluctuations to show real trends

A Realistic Timeline for Results

Week 1–2: Better sleep, more energy, reduced bloating. The scale may not move — or may go up slightly due to muscle inflammation. Don’t panic.

Week 3–5: Clothes start to feel different. Strength visibly improves. Weight may begin to trend down by 0.5–1 kg per week.

Week 6–12: Visible body composition changes. Waist measurements dropping. Energy is significantly higher. The routine feels normal rather than effortful.

Month 3–6: Meaningful fat loss results. People notice. You notice. The habits are so ingrained at this point that missing a day feels weird — which is exactly where you want to be.

The Last Thing Worth Saying

A gym is a great tool. But it’s not the gatekeeper of your health or your results. The people who lose fat and keep it off aren’t necessarily the ones with the most equipment or the best gym — they’re the ones who built a daily routine that survived contact with real life.

Walking after every meal, doing bodyweight circuits in your living room, sleeping well, eating mostly whole foods — none of this is glamorous. None of it makes for a viral fitness reel. But it works, it compounds, and it fits inside a normal human life.

Start with the morning walk tomorrow. Add the rest over the following two weeks. Give it three months before you judge whether it’s working.

It’ll work.

How to Lose Belly Fat with Daily Exercise

Fit Woman Measures Waist In Workout Clothes 2026 03 26 22 50 39 Utc 1 1024x426

How to Lose Belly Fat with Daily Exercise (What Nobody Tells You Until It’s Too Late)

There’s a moment most of us know too well — you’re getting dressed, catch a glimpse of yourself in the mirror, and think, when did that happen? The belly seems to appear out of nowhere, usually somewhere between your late 20s and mid-30s, or after a stressful season of life where takeout became your best friend and walking to the fridge counted as cardio.

I’ve been there. And I’ve tried the shortcuts — the waist trainers, the “7-day detox teas,” the YouTube ab workouts that promised a flat stomach in two weeks. None of it worked the way I hoped. What did work was showing up every single day with a realistic plan and actually understanding how the body loses fat — including why belly fat specifically is the last to go for most people.

Let’s talk about that honestly.

First, Let’s Get This Out of the Way: You Can’t Spot-Reduce Fat

This is the uncomfortable truth that most fitness content dances around. Doing 500 crunches a day will not specifically burn belly fat. Your body doesn’t work like that — it loses fat systemically, meaning it pulls from fat stores all over the body, and the order in which it does that is largely determined by genetics and hormones.

That said — and this is the important part — daily exercise does create the caloric deficit and hormonal environment that eventually leads to fat loss everywhere, including your midsection. The trick is understanding what kind of exercise actually moves the needle and how to structure it into your day without burning out in week two.

Why Belly Fat Sticks Around Longer (It’s Not Just About Eating Too Much)

Visceral fat — the deeper belly fat that wraps around your organs — is particularly stubborn because it’s metabolically active and closely tied to cortisol levels. When you’re stressed, sleep-deprived, or eating in irregular patterns, your body holds onto this fat almost protectively.

This is why two people can follow the exact same workout plan and get wildly different results. The one sleeping six hours on a stressful job will lose fat much more slowly than someone doing the same workout with lower stress and proper recovery. Exercise is one piece of a bigger puzzle.

Knowing this doesn’t mean you’re off the hook — it means you approach the problem smarter.

The Daily Exercise Framework That Actually Works

After trying and abandoning probably a dozen different approaches over three years, what finally clicked for me was a simple three-layer system. Think of it less like a rigid program and more like a daily habit stack.

Layer 1: Non-Negotiable Daily Movement (20–30 Minutes)

This is your baseline. Even on days you feel terrible, tired, or unmotivated, this layer stays. It’s not intense — it’s consistent.

A brisk 25-minute walk does more for belly fat reduction than people give it credit for. Not because it burns massive calories in the moment, but because it:

  • Lowers cortisol over time when done consistently
  • Improves insulin sensitivity (which directly affects where your body stores fat)
  • Builds the daily discipline that makes harder workouts feel normal

Apps like Google Fit, Apple Health, or even just a basic Fitbit can track this layer automatically. The goal is 7,000–10,000 steps per day as a non-negotiable floor.

One thing that made this sustainable for me: I stopped treating walks as “not real exercise.” A 30-minute walk after dinner is doing serious metabolic work. Give it the respect it deserves.

Layer 2: Resistance Training (3–4 Days Per Week)

Here’s where most people go wrong with belly fat — they go all-in on cardio and skip strength training entirely. This is a mistake.

Muscle is a metabolically expensive tissue. The more of it you carry, the more calories your body burns at rest. Building muscle through resistance training raises your basal metabolic rate, which means you’re passively burning more fat even while sitting at your desk.

You don’t need a gym membership to start. A simple at-home routine with your bodyweight or a pair of dumbbells covers the basics:

Sample Weekly Resistance Routine (Beginner to Intermediate):

Day 1 — Lower Body

  • Squats: 3 sets of 12–15 reps
  • Romanian deadlifts (with dumbbells): 3 sets of 10
  • Reverse lunges: 3 sets of 12 each leg
  • Glute bridges: 3 sets of 15

Day 2 — Upper Body

  • Push-ups (or dumbbell press): 3 sets of 10–12
  • Dumbbell rows: 3 sets of 10 each arm
  • Overhead press: 3 sets of 10
  • Tricep dips or extensions: 3 sets of 12

Day 3 — Full Body / Core Focus

  • Deadbugs: 3 sets of 10 each side
  • Plank holds: 3 sets of 30–45 seconds
  • Mountain climbers: 3 sets of 20
  • Dumbbell thrusters: 3 sets of 10

Rest 60–90 seconds between sets. Total time: 30–40 minutes per session.

Layer 3: One Weekly High-Intensity Session

This is the layer that accelerates results when the foundation is already solid. One session per week of HIIT (high-intensity interval training) or circuit training pushes your cardiovascular fitness and creates what’s called the EPOC effect — excess post-exercise oxygen consumption — where your body continues burning calories at an elevated rate for hours after you finish.

A simple HIIT session structure (20 minutes):

  • 30 seconds work / 30 seconds rest
  • Exercises: Jump squats, burpees, high knees, kettlebell swings, battle ropes
  • 6–8 rounds total

Don’t do this more than twice a week. It’s high stress on the system, and overdoing intensity without adequate recovery is one of the fastest ways to stall fat loss due to elevated cortisol.

The Daily Structure That Made It All Click

Here’s what a realistic day looked like for me during the stretch where I actually made consistent progress:

Morning: 10-minute walk outside before checking my phone. No agenda, no podcast. Just movement and light exposure. This alone helped regulate my sleep cycle, which helped fat loss indirectly.

Mid-morning or lunch break: Resistance training (on days it was scheduled). 35–40 minutes. Done.

Evening: 20-minute walk after dinner. This one is underrated — post-meal walks improve blood sugar regulation significantly, which means less fat storage from carbohydrates.

Total daily movement: 60–90 minutes, spread out. Not a single grueling 90-minute session that leaves you exhausted and sore for three days.

The Mistakes I Made (So You Don’t Have To)

Mistake 1: Doing too much cardio, too soon. In my first serious attempt, I was running 5 miles every day and doing ab circuits on top of it. I lost weight quickly at first, then completely stalled. The body adapted, my appetite went through the roof, and I ended up eating back every calorie I burned. Chronic cardio also elevated my stress hormones, which actually promoted belly fat retention. Ironic.

Mistake 2: Neglecting sleep. I was getting 5–6 hours a night and wondering why the scale wasn’t moving. Sleep is when growth hormone is released — the very hormone that helps your body burn fat and preserve muscle. Poor sleep also drives cravings for high-calorie foods by increasing ghrelin (the hunger hormone) and decreasing leptin (the satiety hormone). I started treating sleep like training. 7–8 hours became non-negotiable.

Mistake 3: Weighing myself every morning and adjusting behavior based on daily fluctuations. Your weight can swing 2–4 pounds in a single day based on water retention, food volume, sodium, and hormones. Using daily scale weight as feedback led me to panic and either over-restrict or completely give up. Tracking weekly averages (I used an app called Happy Scale) smoothed out the noise and showed actual trends.

Mistake 4: Thinking diet and exercise were separate conversations. They’re not. You can exercise daily and still not lose belly fat if your nutrition is consistently putting you in a caloric surplus. I’m not saying to obsessively count calories forever — but being aware of portion sizes and reducing ultra-processed foods made the exercise actually show results.

What Exercises Are Best Specifically for Belly Fat?

Since spot reduction isn’t real, the “best” exercises for belly fat are the ones that burn the most total calories and build the most muscle over time. That said, certain exercise styles are particularly effective:

Compound movements (squats, deadlifts, rows, press) recruit multiple muscle groups simultaneously — they burn more calories per rep than isolation exercises and build more overall muscle.

Walking is genuinely one of the highest-ROI exercises for fat loss because it’s sustainable, repeatable, and doesn’t spike cortisol. Sounds boring, works like magic when done consistently.

HIIT circuits beat steady-state cardio for time efficiency. 20 minutes of HIIT produces similar (sometimes better) fat loss results compared to 45 minutes of jogging, for most people.

Core-specific exercises (planks, deadbugs, pallof press) don’t burn belly fat directly but they strengthen your core, improve posture, and make your midsection appear flatter even before significant fat loss occurs. Worth including.

Tracking Progress Without Losing Your Mind

The scale alone is a terrible indicator of belly fat loss progress because of muscle gain, water retention, and other variables. Better metrics to track:

  • Waist circumference: Measure at the belly button, at the same time each week (morning, after bathroom). This is the clearest signal of visceral fat change.
  • Progress photos: Take them every 2–3 weeks, same lighting, same angle. Visual changes show up in photos before they register on a scale.
  • How your clothes fit: Often the most honest measure. When jeans start fitting differently around the waist, something is happening.
  • Energy and strength levels: If you’re sleeping better, feeling more energetic, and lifting more weight than six weeks ago, your body composition is changing even if the scale looks the same.

How Long Does It Actually Take?

Honestly? Visible belly fat reduction takes longer than most fitness content will admit.

For most people following a consistent exercise routine with reasonable nutrition:

  • Weeks 1–3: Mostly nervous system adaptation, better sleep, subtle energy improvements. The scale may not move much.
  • Weeks 4–8: Clothes start fitting differently. Strength increases noticeably. Some people see 1–2 inches off the waist.
  • Weeks 8–16: Visible changes in the midsection for consistent people. Fat loss of 0.5–1 pound per week is realistic and sustainable.

Anyone promising flat abs in 30 days is selling you something. Real change is slower and messier — but it’s also more durable. People who lose belly fat over six months at a sustainable pace keep it off. People who crash it in six weeks usually don’t.

A Word on Nutrition (Because You Can’t Out-Exercise a Bad Diet)

This article is about exercise, not nutrition — but pretending the two aren’t inseparably linked would be dishonest. You don’t need to follow a specific diet. But reducing ultra-processed foods, eating enough protein (roughly 0.7–1g per pound of bodyweight helps with muscle retention while losing fat), and not consistently overeating will determine whether your exercise actually shows up in the mirror.

If tracking calories feels overwhelming, start simpler: eat mostly whole foods, stop eating when you’re 80% full, and cut liquid calories (sodas, juices, fancy coffee drinks with 400 calories). Those three things alone create a meaningful caloric reduction for most people without obsessive counting.

The Real Secret Is Boringly Simple

No trendy exercise modality or fat-loss gadget is going to save you. The people I’ve watched actually lose belly fat and keep it off share the same boring traits: they walked a lot, lifted weights a few times a week, slept well, and ate mostly real food. They didn’t do anything extreme. They just showed up, consistently, for months.

The frustrating part is that there’s no clever hack to shortcut past that consistency. But the good news is — the daily habits required to lose belly fat are actually pretty compatible with a normal life. You don’t need two-hour gym sessions or a restrictive meal plan. You need a daily walk, three good workouts a week, and enough sleep to let your body do its job.

Start smaller than you think you need to. Stay more consistent than you think you can. The belly fat will follow.

FAQs

1. Can I lose belly fat with exercise only?

Exercise helps a lot, but combining it with better eating habits speeds up results significantly.

2. How long should I exercise daily?

30–45 minutes is enough if you stay consistent.

3. Are crunches effective for belly fat?

They strengthen your core but don’t directly burn belly fat.

4. Is walking enough to reduce belly fat?

Yes, if done regularly and combined with a healthy lifestyle.

5. How fast can I see results?

Most people notice visible changes within 4–8 weeks with consistent effort.

11 Best Foods for Health and Fitness Beginners

Bowl With Granola Berries Nuts And Yogurt 2026 03 26 02 58 33 Utc 1 1024x683

11 Best Foods for Health and Fitness Beginners

Introduction

Starting your health and fitness journey can feel a bit overwhelming, right? You’re told to work out, eat clean, stay consistent, and somehow enjoy it all at the same time. But here’s the truth: your diet is the foundation of everything. Think of your body like a car. Even the best engine won’t run properly if you fill it with poor-quality fuel.

That’s why choosing the right foods matters, especially when you’re just beginning. The good news is, you don’t need complicated meal plans or expensive superfoods. Simple, everyday foods can help you build strength, improve energy, and feel better overall.

In this guide, we’ll break down the 11 Best Foods for Health and Fitness Beginners in a way that’s easy to follow and practical for daily life.

Table of Contents

Sr#Headings
1Why Nutrition Matters for Beginners
2Eggs – The Perfect Protein Source
3Oats – Slow Energy That Lasts
4Chicken Breast – Lean Muscle Builder
5Bananas – Quick Energy Booster
6Brown Rice – Healthy Carbohydrates
7Yogurt – Gut Health and Protein
8Almonds – Healthy Fats for Energy
9Spinach – Nutrient Powerhouse
10Sweet Potatoes—Clean Energy Fuel
11Fish – Omega-3 for Recovery
12Water – The Most Overlooked Essential
13How to Combine These Foods
14Common Mistakes Beginners Make
15Final Thoughts

1. Why Nutrition Matters for Beginners

When you start exercising, your body goes through stress and adaptation. Without proper nutrition, you’ll feel tired, weak, and frustrated.

Key points:

  • Food fuels your workouts
  • Helps muscle recovery
  • Supports fat loss and strength gain

If workouts are the effort, then food is the support system behind it.

2. Eggs – The Perfect Protein Source

Eggs are one of the easiest and most affordable protein sources out there.

Why they’re great:

  • High-quality protein for muscle repair
  • Rich in vitamins like B12 and D
  • Keep you full longer

How to eat:

  • Boiled eggs for breakfast
  • Omelet with vegetables
  • Scrambled eggs post-workout

3. Oats – Slow Energy That Lasts

Oats are ideal for beginners because they provide steady energy.

Benefits:

  • High in fiber
  • Keeps blood sugar stable
  • Supports digestion

Best time to eat:
Morning or before workouts

Think of oats as a slow-burning fuel, like logs in a fire that keep it going for hours.

4. Chicken Breast – Lean Muscle Builder

If your goal is to build muscle or tone your body, chicken breast is a must.

Why it works:

  • Low in fat
  • High in protein
  • Easy to cook in different ways

Simple ideas:

  • Grilled chicken with salad
  • Chicken wraps
  • Stir-fry with vegetables

5. Bananas – Quick Energy Booster

Bananas are nature’s energy bar.

Benefits:

  • Rich in potassium
  • Prevent muscle cramps
  • Quick energy before workouts

Best use:

  • Eat 30 minutes before exercise
  • Blend into smoothies

6. Brown Rice – Healthy Carbohydrates

Carbs are not your enemy. The right carbs are essential.

Why brown rice is better:

  • High in fiber
  • Releases energy slowly
  • Keeps you full

Pair it with protein like chicken or fish for a balanced meal.

7. Yogurt – Gut Health and Protein

Your gut health directly affects your energy and recovery.

Why yogurt helps:

  • Contains probiotics
  • Good source of protein
  • Improves digestion

How to use:

  • With fruits for breakfast
  • As a snack
  • In smoothies

8. Almonds – Healthy Fats for Energy

Fats are often misunderstood, but healthy fats are essential.

Benefits of almonds:

  • Boost energy
  • Support brain health
  • Help control hunger

Tip:
A small handful daily is enough.

9. Spinach – Nutrient Powerhouse

Spinach is packed with vitamins and minerals your body needs.

Why include it:

  • High in iron
  • Supports muscle function
  • Low in calories

Add it to:

  • Omelets
  • Smoothies
  • Salads

10. Sweet Potatoes – Clean Energy Fuel

Sweet potatoes are one of the best carb sources for beginners.

Why they’re great:

  • Rich in fiber
  • High in vitamins A and C
  • Provide steady energy

Perfect for:

  • Lunch or dinner
  • Pre-workout meals

11. Fish – Omega-3 for Recovery

Fish like salmon or tuna are excellent for recovery.

Benefits:

  • Rich in omega-3 fatty acids
  • Reduce inflammation
  • Support muscle repair

Try to include fish 2–3 times per week.

12. Water – The Most Overlooked Essential

This might sound basic, but it’s often ignored.

Why hydration matters:

  • Improves performance
  • Helps digestion
  • Prevents fatigue

Simple rule:
Drink at least 6–8 glasses daily, more if you exercise.

13. How to Combine These Foods

You don’t need complicated meal plans. Just mix and match.

Example daily plan:

  • Breakfast: Oats + yogurt + banana
  • Lunch: Chicken + brown rice + spinach
  • Snack: Almonds + fruit
  • Dinner: Fish + sweet potatoes

Keep it simple and consistent.

14. Common Mistakes Beginners Make

Starting out is exciting, but many people make avoidable mistakes.

Watch out for:

  • Skipping meals
  • Eating too little protein
  • Relying on junk food
  • Ignoring hydration

Consistency matters more than perfection.

15. Final Thoughts

You don’t need a perfect diet to get started. You just need a better one than yesterday.

The 11 Best Foods for Health and Fitness Beginners are simple, accessible, and effective. Start by adding a few of these into your routine. Over time, small changes turn into big results.

Remember, fitness is not a sprint. It’s a long-term commitment. And it starts with what’s on your plate.

FAQs

1. What is the best food to start a fitness journey?

Eggs and oats are great starting points because they provide protein and sustained energy.

2. Can I build muscle without supplements?

Yes, whole foods like chicken, fish, and eggs provide enough nutrients for beginners.

3. How many meals should beginners eat daily?

3 main meals with 1–2 healthy snacks work well for most people.

4. Is it okay to eat carbs while trying to lose weight?

Yes, healthy carbs like brown rice and sweet potatoes are important for energy.

5. How much water should I drink during workouts?

Drink small amounts during exercise and stay hydrated throughout the day.

Transform Your Fitness Routine: A Complete 20-Minute Home Workout That Fits Any Schedule

AQ3p1 GWR3CDx1fyAMG0Jw@2k

Transform Your Fitness Routine: A Complete 20-Minute Home Workout That Fits Any Schedule

I still remember the day I realized my gym membership was basically paying for a very expensive shower. Between work deadlines, family commitments, and the 30-minute drive to the fitness center, I was lucky if I made it there twice a month. Sound familiar?

That frustration led me to discover something that changed everything: effective workouts don’t need hours of your time or fancy equipment. In fact, some of the most powerful fitness routines happen right in your living room in just 20 minutes.

If you’re tired of workout plans that assume you have unlimited time and a personal trainer’s budget, this complete home workout guide is exactly what you need. We’ll break down the science behind short, intense sessions and give you a step-by-step routine that delivers real results without disrupting your already packed schedule.

Why Short Home Workouts Are More Effective Than You Think

The Science Behind High-Intensity Exercise Sessions

Here’s what most people don’t realize: your body doesn’t actually care where you exercise or how long you spend doing it. What matters is the intensity and consistency of your effort.

Research published in the Journal of Sports Medicine shows that 20-minute high-intensity workouts can produce the same cardiovascular benefits as 60-minute moderate sessions. A study from McMaster University found that participants who did brief, intense workouts three times per week improved their aerobic capacity by 20% in just six weeks.

The magic happens through something called EPOC (Excess Post-Exercise Oxygen Consumption). When you push your body hard for short bursts, it continues burning calories at an elevated rate for up to 24 hours after you finish exercising. I think of it as getting a bonus workout while you’re sitting at your desk or sleeping.

One study tracked participants for 14 weeks and found that those doing 20-minute HIIT sessions lost 2.5 kilograms of body fat, while the group doing 40-minute steady cardio sessions lost only 0.5 kilograms. The shorter workout group also gained lean muscle mass, while the longer cardio group actually lost some muscle.

Time Efficiency and Consistency Advantages

Let me be honest about something: the best workout is the one you’ll actually do. I’ve seen too many people start ambitious 90-minute workout plans only to quit after two weeks because life got in the way.

A survey by the American Council on Exercise found that people are 73% more likely to complete workouts that are 30 minutes or shorter. When that number drops to 20 minutes, completion rates jump to 89%. The reason is simple: it’s much easier to find 20 minutes than it is to carve out an hour.

Think about your typical day. You probably spend 20 minutes scrolling social media, waiting for your coffee to brew, or sitting in traffic. By using that same time frame for exercise, you remove the biggest barrier to fitness: the feeling that you don’t have enough time.

I’ve noticed that shorter workouts also eliminate the mental negotiation that happens with longer sessions. Instead of thinking “I need a full hour today, maybe I’ll do it tomorrow,” you just think “It’s only 20 minutes” and get started.

Physical and Mental Health Benefits in Minimal Time

P NRjtQXSMOEepaN0bMtaA@2k

The physical changes from consistent 20-minute workouts surprised me more than anything else. Within three weeks of starting this routine, my resting heart rate dropped by 8 beats per minute. My energy levels throughout the day improved dramatically, and I was sleeping better at night.

Research from Harvard Medical School shows that just 15-20 minutes of vigorous exercise triggers the release of endorphins and reduces cortisol levels for up to 12 hours. This means your morning workout is still helping you manage stress during your evening commute.

A study involving 2,000 working adults found that those who did short, intense workouts reported 23% less work-related stress and 40% better mood stability compared to those who did longer, moderate exercise sessions. The researchers believe this happens because intense exercise provides a complete mental break, forcing you to focus entirely on the movement.

From a strength perspective, bodyweight exercises in short bursts can build impressive muscle endurance. A 12-week study showed that participants doing 20-minute bodyweight circuits increased their push-up capacity by 156% and their squat endurance by 134%.

Essential Preparation for Your Home Workout Space

Creating the Perfect Exercise Environment

You don’t need a home gym, but you do need a space where you can move freely without worrying about knocking over your coffee table. I learned this the hard way after accidentally kicking my laptop during jumping jacks.

Start by measuring out a 6-foot by 6-foot area. This gives you enough room for all the movements in this workout. If you can’t find that much space, a 4-foot by 8-foot rectangle works just as well. Clear everything breakable or valuable from this zone.

Lighting makes a bigger difference than you might expect. Natural light from a window boosts energy and mood, but if you’re working out early morning or evening, bright overhead lights help you maintain proper form. I keep a small fan nearby because good air circulation prevents that stuffy, overheated feeling that can cut workouts short.

For apartment dwellers, consider your neighbors below. Place a yoga mat or thick towel on the floor to muffle impact sounds. Most jumping exercises can be modified to low-impact versions that are just as effective but much quieter.

Equipment-Free Setup and Optional Accessories

The beauty of this workout is that your body provides all the resistance you need. However, a few household items can add variety without breaking the budget.

A sturdy chair or couch becomes perfect for tricep dips and step-ups. Water bottles or canned goods work as light weights for arm exercises. A backpack filled with books creates adjustable weight for squats and lunges.

If you want to invest in one piece of equipment, I recommend a basic exercise mat. It costs around $20 and makes floor exercises much more comfortable. Plus, rolling it out becomes a mental signal that it’s workout time.

Resistance bands are another excellent addition for about $15. They take up zero storage space and add upper body challenge when you’re ready to progress beyond bodyweight movements.

Safety Considerations and Injury Prevention

KLH7ht2oQAabGXS7iGOq2Q@2k

I once pulled a muscle during what should have been an easy warm-up because I was exercising on a slippery hardwood floor in socks. Learn from my mistake: wear shoes with good grip or go barefoot on a non-slip surface.

Check your ceiling height by reaching both arms overhead and adding 6 inches. If you don’t have enough clearance, skip overhead movements and focus on exercises that keep your arms below shoulder height.

Remove any rugs or mats that might slide during lateral movements. Pets should be in another room (trust me on this one). Make sure your phone is nearby but not where you might step on it during the workout.

If you have any joint issues or previous injuries, start with the beginner modifications and listen to your body. Some muscle fatigue is normal, but sharp pain means stop immediately.

Dynamic Warm-Up Routine to Prime Your Body

Joint Mobility and Activation Movements

Jumping straight into intense exercise is like starting your car and immediately flooring it on a cold morning. Your body needs a few minutes to get all systems working smoothly.

Start with slow neck rolls: 5 in each direction, focusing on any tight spots. Move to shoulder rolls, lifting your shoulders up, back, and down in a smooth motion. Do 10 forward and 10 backward.

For your lower body, stand on one foot and make slow circles with the other leg, focusing on moving from the hip joint. Switch legs after 8 circles in each direction. Follow this with gentle leg swings: hold onto a wall and swing one leg forward and back, then side to side.

Spinal twists wake up your core: stand with feet hip-width apart and slowly rotate your torso left and right, letting your arms follow naturally. Do this for 30 seconds, gradually increasing the range of motion.

Heart Rate Elevation Techniques

Now it’s time to get your heart pumping and blood flowing to your muscles. March in place for 30 seconds, lifting your knees higher with each step. Progress to gentle jumping jacks or step-touches if you need a quieter option.

Add arm circles: small ones for 15 seconds, then larger ones for 15 seconds. Your heart rate should start climbing, but you shouldn’t feel breathless yet.

Focus on deep breathing throughout this phase: in through your nose for 3 counts, out through your mouth for 3 counts. This delivers oxygen to your muscles and helps establish the mind-muscle connection you’ll need for the main workout.

Movement Pattern Rehearsal

This is where you practice simplified versions of the exercises you’re about to perform. Do 5 slow bodyweight squats, focusing on proper form rather than speed. Follow with 5 modified push-ups from your knees or against a wall.

Practice the plank position: hold it for 10 seconds, concentrating on keeping your body straight from head to heels. Do 5 gentle lunges on each side, stepping forward and back slowly.

This rehearsal phase isn’t just physical preparation. It’s also when your brain starts firing up the neural pathways you’ll need for coordinated movement during the intense portions of the workout.

The Complete 20-Minute Workout Breakdown

OGMiGNIOT0 Zsv9Hjy8dAw@2k

Upper Body Strength Circuit (6 minutes)

We’ll start with upper body because your legs are still fresh and can help support these movements. Set a timer for 6 minutes and move through each exercise for 45 seconds, followed by 15 seconds of rest.

Push-Up Variations: Begin with standard push-ups if you can maintain proper form for at least 5 repetitions. If not, do knee push-ups or wall push-ups. The key is continuous movement for the full 45 seconds. I like to aim for 2 push-ups every 5 seconds, but find your own sustainable pace.

Pike Push-Ups: These target your shoulders and prepare you for more advanced movements later. Start in a downward dog position and lower your head toward your hands. If this is too challenging, do the movement against stairs, placing your feet on the second or third step.

Tricep Dips: Using a sturdy chair or couch edge, lower your body by bending your elbows. Keep your legs bent for an easier version or straight for more challenge. Focus on controlled movement rather than speed.

Mountain Climbers: Finish this circuit with 45 seconds of mountain climbers to get your heart rate up before moving to lower body work.

Lower Body Power Movements (6 minutes)

Your legs contain your body’s largest muscle groups, so this section will challenge your cardiovascular system while building strength. Continue with the 45-second work, 15-second rest pattern.

Squat Variations: Start with bodyweight squats, sitting back as if you’re sitting in a chair. Once you can do 15 in a row with good form, progress to jump squats. Land softly and immediately go into the next squat. For apartment dwellers, stick with regular squats but add a pulse at the bottom.

Multi-Direction Lunges: Begin with forward lunges, stepping out and dropping your back knee toward the floor. Alternate legs throughout the 45 seconds. In your next round, try reverse lunges or lateral lunges to hit different muscle angles.

Single-Leg Glute Bridges: Lie on your back and lift your hips using one leg while keeping the other leg extended. This exercise surprised me with how challenging it is. Switch legs halfway through the 45 seconds.

Wall Sit: Find a wall and slide down until your thighs are parallel to the floor. Hold this position for 45 seconds. This static exercise gives you a mental break from dynamic movements while seriously challenging your leg strength.

Core and Full-Body Integration (8 minutes)

This final section combines everything and pushes your cardiovascular system to its limit. The longer time frame allows for more complex movement patterns and a strong finishing effort.

Plank Variations: Hold a standard plank for 30 seconds, then move into side planks for 15 seconds each side. If you’re feeling strong, add plank-to-downward dog movements or plank jacks.

Burpee Variations: Love them or hate them, burpees work everything. Start standing, squat down, jump back to plank position, do a push-up, jump forward, then jump up with arms overhead. Modify by stepping back and forward instead of jumping, or remove the push-up component.

High Knees and Butt Kickers: Alternate between these two exercises for active recovery between harder movements. High knees for 20 seconds, butt kickers for 20 seconds.

HIIT Finisher: For the final 2 minutes, cycle through your favorite exercises from the previous circuits. Do each exercise for 20 seconds at maximum effort, rest for 10 seconds, then move to the next. This is where you empty the tank and finish strong.

Proper Cool-Down and Recovery Techniques

Heart Rate Recovery Methods

After 20 minutes of intense work, your heart is pumping fast and your body temperature is elevated. The cool-down phase is just as important as the workout itself for long-term results and injury prevention.

Start by walking in place for 2 minutes, gradually slowing your pace. Your breathing should start returning to normal, but don’t sit down immediately. Keep moving to help your heart rate come down gradually.

Practice box breathing: inhale for 4 counts, hold for 4 counts, exhale for 4 counts, hold for 4 counts. Repeat this pattern for 2 minutes. This activates your parasympathetic nervous system and begins the recovery process.

Check your pulse at your wrist or neck. After 2 minutes of walking, it should be noticeably slower than when you finished exercising. After 5 minutes, you should be able to hold a normal conversation without feeling breathless.

Flexibility and Mobility Restoration

Now that your heart rate is under control, it’s time to address the muscles you just worked. Hold each stretch for 30 seconds and focus on breathing deeply.

Hip Flexor Stretch: Step one foot forward into a lunge position and sink your hips down. You should feel this in the front of your back leg’s hip. Switch sides after 30 seconds.

Hamstring Stretch: Sit on the floor with one leg extended and reach toward your toes. Keep your back straight rather than rounding over. The goal isn’t to touch your toes but to feel a gentle stretch along the back of your leg.

Shoulder and Chest Stretch: Place one arm against a wall and gently turn your body away to stretch your chest and front shoulder. This counteracts all the forward-reaching movements from the workout.

Spinal Twist: Sit cross-legged and place one hand behind you, the other on your opposite knee. Gently rotate your spine and hold. This helps decompress your back after all the core work.

Hydration and Post-Workout Nutrition

You probably didn’t realize you were sweating that much during the workout, but your body lost more fluid than you think. Drink 16-20 ounces of water over the next hour, taking small sips rather than chugging it all at once.

Within 30 minutes after finishing, try to eat something that combines protein and carbohydrates. This doesn’t have to be complicated: a banana with peanut butter, Greek yogurt with berries, or even chocolate milk all work perfectly.

I’ve found that eating something within that 30-minute window makes a huge difference in how I feel the next day. My energy stays stable, and I’m much less likely to experience muscle soreness.

If you worked out in the morning, pay attention to your hunger cues throughout the day. Intense exercise can increase appetite, which is completely normal. Just make sure you’re eating nutritious foods rather than using the workout as an excuse for poor food choices.

Summary

This comprehensive 20-minute home workout provides a complete fitness solution that requires no equipment and minimal space. By combining scientific principles of high-intensity exercise with practical home-based movements, this routine delivers maximum health benefits in minimum time. The structured approach includes proper preparation, dynamic warm-up, targeted exercise circuits, and essential recovery techniques to ensure safe and effective workouts that can be maintained consistently regardless of location or schedule constraints.

The beauty of this routine lies not just in its efficiency, but in its accessibility. Whether you’re a busy parent, a traveling professional, or someone just starting their fitness journey, these 20 minutes can fit into any schedule and adapt to any living situation.

Remember, consistency beats intensity every time. Start with three sessions per week and focus on proper form rather than speed. Your body will adapt, your strength will improve, and most importantly, you’ll build a sustainable habit that supports your health for years to come.

Frequently Asked Questions

Q: How many times per week should I do this 20-minute workout?

A: For optimal results, perform this workout 3-4 times per week with at least one rest day between sessions to allow for proper muscle recovery.

Q: Can beginners safely follow this workout routine?

A: Yes, all exercises include modifications for different fitness levels. Start with easier variations and gradually progress as your strength and endurance improve.

Q: What if I don’t have enough space for jumping exercises?

A: Every high-impact movement has a low-impact alternative provided. You can substitute jumping jacks with step-touches and jump squats with regular squats.

Q: Is this workout effective for weight loss?

A: When combined with proper nutrition, this high-intensity routine can support weight loss goals by burning calories during exercise and increasing metabolism post-workout.

Q: How do I know if I’m working at the right intensity?

A: You should feel challenged but able to maintain proper form. During high-intensity portions, you should feel slightly breathless but still able to speak short phrases.

Q: Can I do this workout if I live in a small apartment?

A: Absolutely. The workout is designed for spaces as small as 6 feet by 6 feet, and all exercises can be performed with consideration for neighbors below.

Beginner Full Body Workout at Home Without Gym

Fitness Enthusiast Demonstrating Various Exercises 2026 01 08 23 21 57 Utc 1024x819

Beginner Full Body Workout at Home (No Gym Needed)

Nobody tells you this when you’re starting out: the hardest part of a beginner workout isn’t the workout itself. It’s the ten minutes before you start, when your brain is busy negotiating.

“I don’t have equipment.” “I don’t have space.” “I don’t know what I’m doing.” “I’ll start Monday.”

I’ve had every one of those conversations with myself. And I’ve learned that most of them are just excuses dressed up as logistics. You don’t need a gym membership, a rack of dumbbells, or 400 square feet of open floor space to get a genuinely good full body workout. You need a mat, a body, and a plan that doesn’t overwhelm you on day one.

This article is that plan.

Before Anything Else — What “Full Body” Actually Means

A lot of beginners think full body means doing every exercise imaginable in one session. It doesn’t.

Full body just means you’re hitting the major muscle groups in a single workout — legs, back, chest, shoulders, core — rather than splitting them into separate days. For beginners, this is actually the smarter approach. Here’s why:

When you’re new to exercise, your nervous system hasn’t learned how to properly recruit your muscles yet. Every time you train, you’re teaching your body new movement patterns. Doing full body sessions three times a week means you practice those patterns three times a week — which accelerates progress far more than doing chest on Monday and legs on Thursday.

Also, if you miss a session (and you will sometimes), you haven’t completely skipped a muscle group for the whole week.

What You Actually Need

Let’s settle this immediately:

Required:

  • A yoga mat or any soft surface (even a folded blanket works)
  • Yourself

Optional but helpful:

  • A resistance band (light to medium — around $8–15 on Amazon or any sports shop)
  • A pair of light dumbbells (3–5 kg for most beginners — again, not expensive)
  • A sturdy chair

That’s it. No pull-up bar. No bench. No cables. Every exercise in this program can be done with bodyweight alone. The optional equipment just adds variety and progression once bodyweight starts feeling too easy.

The Workout Structure

This is a three-day-per-week program. You do it Monday, Wednesday, Friday — or any three days with at least one rest day between sessions. That gap is important; it’s when your muscles actually grow and repair.

Each session follows this format:

  1. Warm-up — 5 minutes
  2. Main workout — 25–30 minutes
  3. Cool-down stretch — 5 minutes

Total time: around 40 minutes. If someone tells you they don’t have 40 minutes, they have 40 minutes — they’re just spending it somewhere else. That’s not a judgment, just a reframe.

The Warm-Up (5 Minutes — Don’t Skip This)

Warming up feels like a waste of time until you pull something and have to sit out for two weeks. Then you understand.

The goal is to raise your heart rate gently, loosen your joints, and get blood moving to the muscles you’re about to use. You’re not trying to get tired before the workout even starts.

Do each of these for 45 seconds:

1. March in Place Pick your knees up to about hip height, swing your arms naturally. Nothing dramatic — just get moving. This is also your out: if you truly can’t do anything else, you can always just march in place for a while.

2. Arm Circles Extend both arms to the sides, make slow circles forward for 20 seconds, then reverse for 20 seconds. Small to large. Your shoulders will thank you later.

3. Hip Circles Feet shoulder-width apart, hands on hips, draw big slow circles with your hips like you’re hula-hooping in slow motion. Ten clockwise, ten counter-clockwise. This wakes up the hip joints which take a beating in a lot of lower body exercises.

4. Leg Swings Stand next to a wall for balance. Swing one leg forward and back like a pendulum — controlled, not wild. 15 swings per leg. Great for opening up the hamstrings and hip flexors.

5. Inchworms Stand tall, hinge forward and walk your hands out until you’re in a push-up position, pause for a second, then walk your hands back and stand up. Repeat slowly for 45 seconds. This one does a lot — hamstrings, lower back, shoulders, wrists. If it feels hard right away, that’s fine. Modify by bending your knees slightly.

The Main Workout

This is a circuit-style program. You’ll do all the exercises back to back, rest for 60–90 seconds, then repeat the circuit. Two to three rounds per session.

Week 1–2: 2 rounds, rest 90 seconds between rounds Week 3–4: 3 rounds, rest 60–90 seconds between rounds

For each exercise, the rep range is given. If you can do more than the top end easily, make a note — that’s your cue to progress. If you can’t hit the bottom end, that’s also fine — do what you can and add one or two reps each week.

Exercise 1: Bodyweight Squat

Reps: 12–15

Feet shoulder-width apart or slightly wider. Toes pointed slightly out — not straight ahead, not dramatically turned out, just a natural angle. Lower yourself like you’re sitting back onto a chair that’s slightly behind you. Go as low as you comfortably can — ideally until your thighs are roughly parallel to the floor, but if that’s not there yet, go to where you can without pain.

Drive through your heels to stand back up. That “drive through the heels” cue matters — it keeps your weight back and your knees tracking over your toes properly.

Common mistake beginners make: Letting the knees cave inward on the way up. If this is happening, think about pushing your knees out slightly as you rise.

Exercise 2: Push-Up (or Knee Push-Up)

Reps: 8–12

This one has a reputation for being straightforward, but form issues are extremely common.

Start in a plank position — hands slightly wider than shoulder-width, body in a straight line from head to heels. Lower your chest toward the floor, elbows at roughly a 45-degree angle from your torso (not flared straight out to the sides). Press back up.

If that’s too hard right now (and there’s zero shame in this — a proper push-up requires significant chest, shoulder, and core strength), drop to your knees. Knee push-ups are a legitimate exercise and a solid stepping stone. Do them properly — body still in a straight line from knees to head, core tight, not letting your hips sag down.

The goal over the coming weeks is to gradually move toward full push-ups. Start with, say, four knee push-ups and try one full push-up. Week by week, flip that ratio.

Exercise 3: Glute Bridge

Reps: 12–15

Lie on your back. Knees bent, feet flat on the floor, hip-width apart. Arms at your sides, palms down.

Squeeze your glutes and press your hips up toward the ceiling until your body forms a straight line from your shoulders to your knees. Hold for a second at the top — really squeeze. Lower slowly.

This exercise targets the glutes and hamstrings, which are chronically underused in people who sit a lot. It also helps with lower back health, which is a bonus for desk workers.

To make it harder: Hold the top position for 3 seconds. Or do it single-leg — extend one leg out straight and bridge with just one foot on the floor. That changes the game entirely.

Exercise 4: Reverse Lunge

Reps: 10 per leg

Stand tall, feet together. Step one foot back and lower your back knee toward the floor. Your front knee stays roughly over your front ankle — not dramatically pushed forward past your toes. Lower until your back knee is an inch or two from the floor, then push through your front foot to return to standing.

Reverse lunges (stepping back rather than forward) are gentler on the knees than forward lunges and easier to control for beginners. They’re a great entry point.

Keep your chest upright. A lot of beginners hunch forward — resist that urge. If you need to hold onto a wall for balance at first, do it.

Exercise 5: Plank Hold

Time: 20–30 seconds

Forearms on the floor, elbows under shoulders. Body in a straight line — shoulders, hips, knees, ankles all aligned. Don’t let your hips sag down or pike up.

Breathe. This is the part people forget — they hold their breath trying to hold the position and end up shaking unnecessarily. Steady breathing through the hold.

20 seconds is the target in week one. Add five seconds each week. By week four, you should be working toward a 45-second hold, and by week eight, a full minute becomes realistic for most people.

If the plank is too hard: Knee plank — same position but on your knees instead of your feet. The important thing is that your hips don’t drop.

Exercise 6: Superman Hold

Reps: 10–12

Lie face down, arms extended in front of you. Simultaneously lift your arms, chest, and legs off the floor — hold for a count of two, then lower slowly.

This is for the posterior chain — the muscles along the back of your body (lower back, glutes, upper back) that get neglected in a lot of beginner programs that focus only on the “mirror muscles.” Strengthening your posterior chain improves posture, reduces back pain, and makes every other exercise safer.

It looks easy. It isn’t. If you feel it immediately in your lower back, that’s exactly right.

Exercise 7: Standing Oblique Crunch

Reps: 12 per side

Stand with feet hip-width apart. Put one hand behind your head (elbow out to the side), other hand resting on your hip. Crunch sideways — bringing your elbow down toward your hip as you lift that same-side knee up to meet it. Controlled movement. Back to start.

This targets the obliques (side abs) and gets your hip flexors working — all without putting strain on your neck the way traditional floor crunches can.

Do all 12 on one side, then switch.

Rest and Repeat

After completing all seven exercises, that’s one round. Rest for 60–90 seconds — walk around a little, catch your breath, sip some water. Then begin the circuit again.

Two rounds for the first two weeks. Three rounds from week three onward.

The Cool-Down (5 Minutes — Also Not Optional)

Stopping abruptly after a workout isn’t great for your heart rate or your muscles. Cooling down helps bring your heart rate down gradually and stretches the muscles while they’re warm and pliable — which is actually when stretching does the most good.

Hold each stretch for 20–30 seconds per side:

Child’s Pose — Kneel, sit your hips back toward your heels, stretch your arms forward. This decompresses the lower back beautifully.

Hip Flexor Stretch — From a kneeling lunge position, push your hips forward gently until you feel a stretch in the front of the back leg’s hip. Great after lunges and squats.

Hamstring Stretch — Sit on the floor, one leg extended, other foot tucked in. Hinge forward from the hips toward the extended leg — not a dramatic reach, just enough to feel the stretch along the back of the thigh.

Cat-Cow — On hands and knees, alternate between arching your back up (cat) and dropping your belly down (cow). Move slowly. This is the best thing you can do for spinal mobility.

Chest Opener — Clasp your hands behind your back, straighten your arms, and gently lift them while opening your chest upward. Counteracts the forward-hunching position most of us live in.

The 4-Week Progression Plan

Here’s what the first month looks like written out plainly:

WeekRoundsRest Between RoundsNotes
1290 secondsFocus on form, not speed
2290 secondsTry to add 1–2 reps on each exercise
3375 secondsAttempt full push-ups if on knees
4360 secondsIncrease plank hold time

After four weeks, reassess. If this circuit is starting to feel comfortable — like you’re finishing with energy to spare — it’s time to add resistance (a band or light dumbbells) or move to a slightly more advanced program.

Progress should feel like work. If it stops feeling like work, make it harder. That’s not a complicated rule, but it’s the one that keeps results coming.

What to Eat Around This Workout

You don’t need to overhaul your entire diet to benefit from this program — that’s too much change at once for most people.

A few practical basics:

Before the workout (30–60 minutes prior): Something light with carbs if you’re working out in the morning. A banana, a piece of toast, or even a date or two. If you’re training in the afternoon or evening and you’ve eaten a normal meal a couple of hours before, you probably don’t need anything extra.

After the workout: This is when your muscles are primed to absorb protein. A simple option: eggs, Greek yogurt, a protein shake (a basic whey or plant-based protein — nothing fancy), or dal and roti if that’s what you have. You don’t need $50 protein powders. You need adequate protein from whatever real food you normally eat.

Hydration: Drink water before, during, and after. Dehydration makes workouts feel harder than they need to be and slows recovery.

Common Beginner Mistakes (From Someone Who Made All of Them)

Going too hard too fast. Week one is not the time to push until you can’t walk the next day. DOMS (delayed onset muscle soreness) that leaves you unable to sit down properly is not a badge of honour — it’s a sign you overdid it and now you’re going to miss your next session.

Skipping the warm-up. Already covered this, but worth repeating. Cold muscles and sudden exertion is how strains happen.

Inconsistent breathing. Hold your breath during a squat and you spike your blood pressure unnecessarily. Exhale on the effort (the hardest part of the movement), inhale on the easier part.

Comparing to people online. The fitness content you see on social media is almost entirely people who have been training for years doing things they spent years building up to. Your week-one is not their week-one. You’re not behind. You’re just at the beginning.

Changing the program every week. This is a big one. Beginners often get bored and start mixing in exercises they saw on YouTube, swapping things out, restructuring everything. Stick to one program for at least four to six weeks. Progress happens through consistency and progression — not variety.

Tracking Your Progress (Simply)

You don’t need an elaborate spreadsheet. A note in your phone works fine.

After each session, write down:

  • Which round number you completed
  • How many reps you managed for each exercise
  • Anything you noticed (e.g., “push-ups felt easier,” “left knee uncomfortable during lunges”)

That’s it. Over four weeks, this becomes a valuable record. You’ll see the progress clearly — and on the days it feels like nothing is changing, looking back at week one numbers is a quick reminder that it is.

A Word on Rest Days

On your off days — Tuesday, Thursday, Saturday, Sunday — you’re not supposed to do nothing. You’re supposed to recover.

Light movement is ideal on rest days: a 20–30 minute walk, some gentle stretching, a beginner yoga video (Yoga with Adriene on YouTube has great short sessions for exactly this). This keeps blood flowing to your muscles, reduces soreness, and doesn’t stress the body the way a workout would.

Two full consecutive rest days (like Saturday and Sunday) are fine once a week. More than two days off in a row, and you start to lose the rhythm — both physically and mentally.

Moving Forward After the First Month

After four weeks of this program done consistently, you’ll be in a noticeably different place than when you started. Not visually dramatic, necessarily — but stronger, more coordinated, and (this is the part people underestimate) just more comfortable in your own body.

From here, your options are wide open:

  • Add resistance bands or dumbbells to this same circuit and run it for another four weeks
  • Move to a split program (upper/lower body alternating days) if you want to train four days a week
  • Try a structured app program like Nike Training Club’s beginner tracks or the Bodyweight Fitness recommended routine from r/bodyweightfitness

The main thing is not to stop once the first program gets easy. That’s exactly when the real results are starting to compound.

The honest truth is that this workout is simple. That’s intentional. Simple is what gets done. Simple is what gets repeated. And repeated is the only thing that actually works.

You don’t need to find something complicated to believe it’ll be effective. You just need to show up three times a week, do the work, and give it long enough to matter.

Week one, that feels like a lot to ask. By week four, it’s just part of your week.

How to Stay Motivated for Daily Home Exercise Without Burnout

Tired Woman Lying On A Fitness Mat After Her Train 2026 01 07 05 58 47 Utc 1024x681

How to Stay Motivated for Daily Exercise at Home Without Burning Out in Week Two

I am going to be honest with you. I have quit home workout routines times than I can count.

I have tried a lot of things.

There was the time I bought a resistance band set and used it for four days.

Then it just sat under my bed for eight months.

I also tried a 30-day YouTube challenge. I stopped on day nine because I just did not feel like doing it.

There was a time when I set my alarm for 6 AM every morning planning to work out. Then I just turned it off and went back to sleep.

I did this every day for two weeks.

So when people ask me how to stay motivated for exercise at home I do not give them the motivational answer.

I give them the things that actually worked for me after all those failed attempts.

Exercise at home is something I have struggled with.

I found some things that really helped me.

 Why Home Workouts Feel Harder Than the Gym

On paper working out at home should be easier.

There is no commute, no waiting for machines and no judgment from people.

In reality most people find it harder to stay consistent with home workouts.

The reason for this is that the gym has a built-in contract.

You paid for your gym membership you drove to the gym and people can see you working out.

All of these things create pressure that keeps you going even when you do not feel motivated.

At home there is no pressure.

Your couch is a few feet away your phone is on the table. Your brain knows that nobody is watching you.

This is the problem.

Not laziness, not lack of discipline. The absence of structure that gyms provide.

Once I understood this everything changed for me and my home workouts.

I started to see that I needed to create my structure.

Exercise at home was something I needed to take

Step 1: Stop Relying on Motivation Build a Trigger

Motivation is a feeling and feelings come and go.

If you wait until you feel motivated to work out you will probably only work out a few times a week.

What actually works is a trigger.

A cue that tells your brain it is time to work out.

For me my trigger is putting on my workout shoes.

I know it sounds simple. It works.

I made a rule for myself that if I put on my workout shoes I have to least start my workout.

Over time putting on my shoes became the signal that told my brain it was time to move my body.

Some days I still did not feel like working out. Once my shoes were on I usually finished my workout.

You can build your trigger.

It could be a playlist that you only play during workouts, a -workout drink that you make every time or changing into workout clothes as soon as you wake up.

The trigger does not have to be fancy it just has to be consistent and remind you to do your exercise at home.

I found that having a trigger really helped me.

It made exercise at home something I could do every day.

Step 2: Design Your Environment So Laziness Works in Your Favor

There is a concept called “friction” that I wish someone had explained to me years ago.

Friction is the effort required to do something.

The friction the less likely you are to do it.

Most people accidentally make working out friction and doing nothing low-friction.

You can flip this around.

To reduce friction for exercise you can leave your yoga mat rolled out in the living room keep your dumbbells next to your TV and set your workout clothes out the night

You can also bookmark your workout YouTube channel on your browser homepage.

To add friction to time-wasting activities you can delete media apps from your phone during morning workout hours put your TV remote in another room. Use an app that blocks distracting websites.

I started leaving my yoga mat unrolled in a corner of my room.

Just seeing it every morning was a reminder to do my daily exercise at home.

Since it was already out starting my workout felt easier than avoiding it.

I found that making things easy really helped me.

It made exercise at home something I could do without thinking.

 Step 3: Choose a Program You Actually Like

This is where most people go wrong including me in the past.

I spent months doing HIIT workouts because every fitness influencer said they were the best for weight loss.

I hated every second of them. I quit constantly.

Eventually I switched to low-intensity strength training with some yoga mixed in.

It turns out I actually like lifting things and stretching.

I have been consistent with it for over a year now.

The best workout is the one you will actually do.

So do not be afraid to try things until you find what you like.

You can explore YouTube channels, apps and Reddit communities to find a workout program that works for you and helps you stay motivated for exercise at home.

I found that doing something I liked really helped me.

It made exercise at home something I looked forward to.

Step 4: Use the “Two-Minute Rule” When You Really Do Not Want to Move

On the days when motivations zero use this trick: commit to two minutes of movement.

Not the full workout, two minutes.

You can do a jumping jacks, stretch or walk in place.

What you will find is that once you start moving you will usually keep going.

The hardest part is always starting.

On the occasion you only do two minutes and then stop, that is okay.

You still showed up you did not break your streak completely.

I have used this trick times and it has helped me stay motivated for daily exercise at home.

It is a trick but it really works.

## Step 5: Track Something, But Not Everything

Tracking your progress can work,. The wrong kind of tracking can kill your motivation.

If you track your weight every day and obsess over fluctuations you will demoralize yourself.

Instead track your workout streaks and consistency.

You can use an app to mark your workouts done and seeing your streak grow can be motivating.

You can also track your performance improvements like how push-ups you can do or how long you can hold a plank.

Another thing you can track is how you feel after each workout.

Keep a note one line, after each workout.

Looking back at these notes over time can show you a pattern: you usually feel better after working out even when you did not want to start.

I found that tracking my progress really helped me.

It made exercise at home something I could see was working.

 The Accountability Trick That Actually Works

Everyone says “find an accountability partner”. In practice it often does not work out.

Here is a version that works better: micro-commitments.

Tell one person, a friend or family member your plan for the week.

Not your life goals, this week.

The social pressure of that time-bound commitment can be powerful.

Another option is to join a challenge on an app.

Seeing that other people are doing the workout as you can make it feel less isolated.

I found that having someone to report to really helped me.

It made exercise at home something I felt responsible for.

 What Happens When You Miss Days

You will miss days a few in a row.

Life happens it is normal.

The mistake is treating a missed day like a failed attempt giving up.

Instead use the “never miss rule”: miss once fine. Make it a firm rule that you never miss two days in a row.

One missed day keeps you in the game two becomes three and three becomes a week.

That is how streaks die.

So do not be too hard on yourself if you miss a day.

Just get back on track soon as you can and keep moving forward with your daily exercise at home.

When I had a week at work and missed four days of exercise in a row I did not try to make up for the missed workouts by doing extra sessions.

I just started fresh the day with a simple 20-minute session.

Nothing special. Moved on.

Within a week I was back to my routine.

Be kind to yourself when you miss exercise days be firm about not letting those missed days add up.

I found that being kind to myself really helped me.

It made exercise at home something I could come back to.

Setting Up a Dedicated Exercise Space

You do not need a home gym you need an area.

Even if it is a corner of your bedroom that you clear before exercising, having a consistent physical space helps your brain get ready to exercise.

It is part of your exercise routine.

If space is really small like an apartment or shared room consider:

– A foldable mat that you roll out each time which becomes a ritual

– Resistance bands that store in a drawer

– Doing cardio exercises in a hallway or outside if the weather is good

The worst option is exercising in the same spot where you watch TV or work on a laptop but it is still okay.

If you can create any separation even just moving a chair out of the way and placing your mat in front of a window it helps.

I found that having a space really helped me.

It made exercise at home something I could focus on.

The Role of Music Podcasts and Temptation Bundling

This one changed my mornings completely.

Temptation bundling is an idea from economics: you combine something you have to do exercise, with something you want to do entertainment you enjoy.

I have a podcast, Huberman Lab that I only allow myself to listen to during exercise.

I really look forward to the episode so now I look forward to exercising not because exercising is always fun but because it is when I get to listen to something I enjoy.

You can do this with:

– An audiobook you are currently hooked on

– A playlist that makes you feel

– A YouTube video essay on a topic you are interested in

– An episode of a show if you are doing steady-state cardio

The rule has to be strict: this thing only happens during exercise.

If you listen to your exercise playlist while doing dishes the effect is not as strong protect it.

I found that having something I enjoyed really helped me.

It made exercise at home something I looked forward to.

 What Real Progress Actually Looks Like

Here is something nobody tells beginners enough: in the four to six weeks you will not look different.

You might not even feel dramatically different physically.

What you will notice, if you are paying attention:

– A little energy in the afternoon

– better sleep quality

– A small improvement in how many reps you can do of something

Exercise at home is something that takes time.

It is not a fix but it is worth it.

I found that being patient really helped me.

It made exercise at home something I could stick to.

Daily exercise at home is something I have learned to love.

It is not always easy. It is worth it.

I hope these tips can help you stay motivated for exercise at home.

Remember, it is not about being perfect it is about being consistent.

Most importantly be kind to yourself and have fun with daily exercise, at home.

– A more ease when going up stairs or carrying groceries

These are real results. They are not exciting. They are happening. If you only look for changes and ignore these small things you will think nothing is working and you will quit doing exercise.

The visible changes, like muscle definition, loss and posture improvements come later. Usually around week eight to twelve for people who do moderate exercise.. The internal changes, like feeling a little better come first when you start doing exercise.

You should train yourself to notice and celebrate these changes. They are the foundation that everything else builds on when you start doing exercise and trying to get in shape.

 Apps and Tools Worth Trying

Since you asked for recommendations and not just any apps:

  1. Nike Training Club. It is free. It is really well-designed. It has guided workouts from 15 to 60 minutes for all levels and all equipment levels, including zero equipment.
  • Centr. It costs around $10/month. It has meal plans, exercise programs and meditation. The interface is clean. The programming is actually thought-through.
  • Yoga with Adriene on YouTube**. It is free. If you have never done yoga her “30 Days of Yoga” series is a place to start. Her tone is calm and encouraging without being annoying.
  • Fitbod. It is good if you have some equipment, like dumbbells. It generates workouts based on what you have. It tracks your muscle recovery so you do not overtrain. It has a trial.
  • Streaks (iOS) / Loop Habit Tracker (Android). These apps are for tracking consistency without complexity when you start doing exercise.

 A Note on Rest Days

If you are just starting out three to four days of exercise per week is plenty. Five days is fine if you enjoy doing exercise.. Six or seven consecutive days of training without rest is a recipe for burnout, injury and quitting exercise.

Rest days are not days when you do nothing. They are the days your body repairs. Gets stronger from the work you did when you were doing exercise. Rest, like a walk light stretching or 20 minutes of yoga is great on these days.

The people who burn out fastest are usually the ones who go all-in for two weeks and then crash. Doing exercise in a way beats doing it intensely every time.

The Long Game

Something changed for me around month four of staying consistent with doing exercise. It stopped feeling like something I had to motivate myself to do and started feeling like something I just did like brushing my teeth. It was not exciting and not something I particularly looked forward to every day. It was not something I debated either.

That is the goal when you start doing exercise. Not to have a passion for exercise. To make it automatic enough that it does not require willpower anymore when you are doing exercise.

You get there by building systems not by searching for motivation. By showing up on the days when you only have two minutes if that is all you have. By making your environment do some of the work for you when you are doing exercise. By choosing movement you like of movement you think you should like.

It is genuinely not that complicated once you stop expecting to feel excited, about doing exercise every day.

Some days you will love doing exercise. Some days you will just do it.. That is exactly enough when you are trying to make doing exercise a part of your life.